Part 1: Desktop application
Cleaning your first document (desktop)
Open Draftable Clean to see the main application window with the toolbar across the top.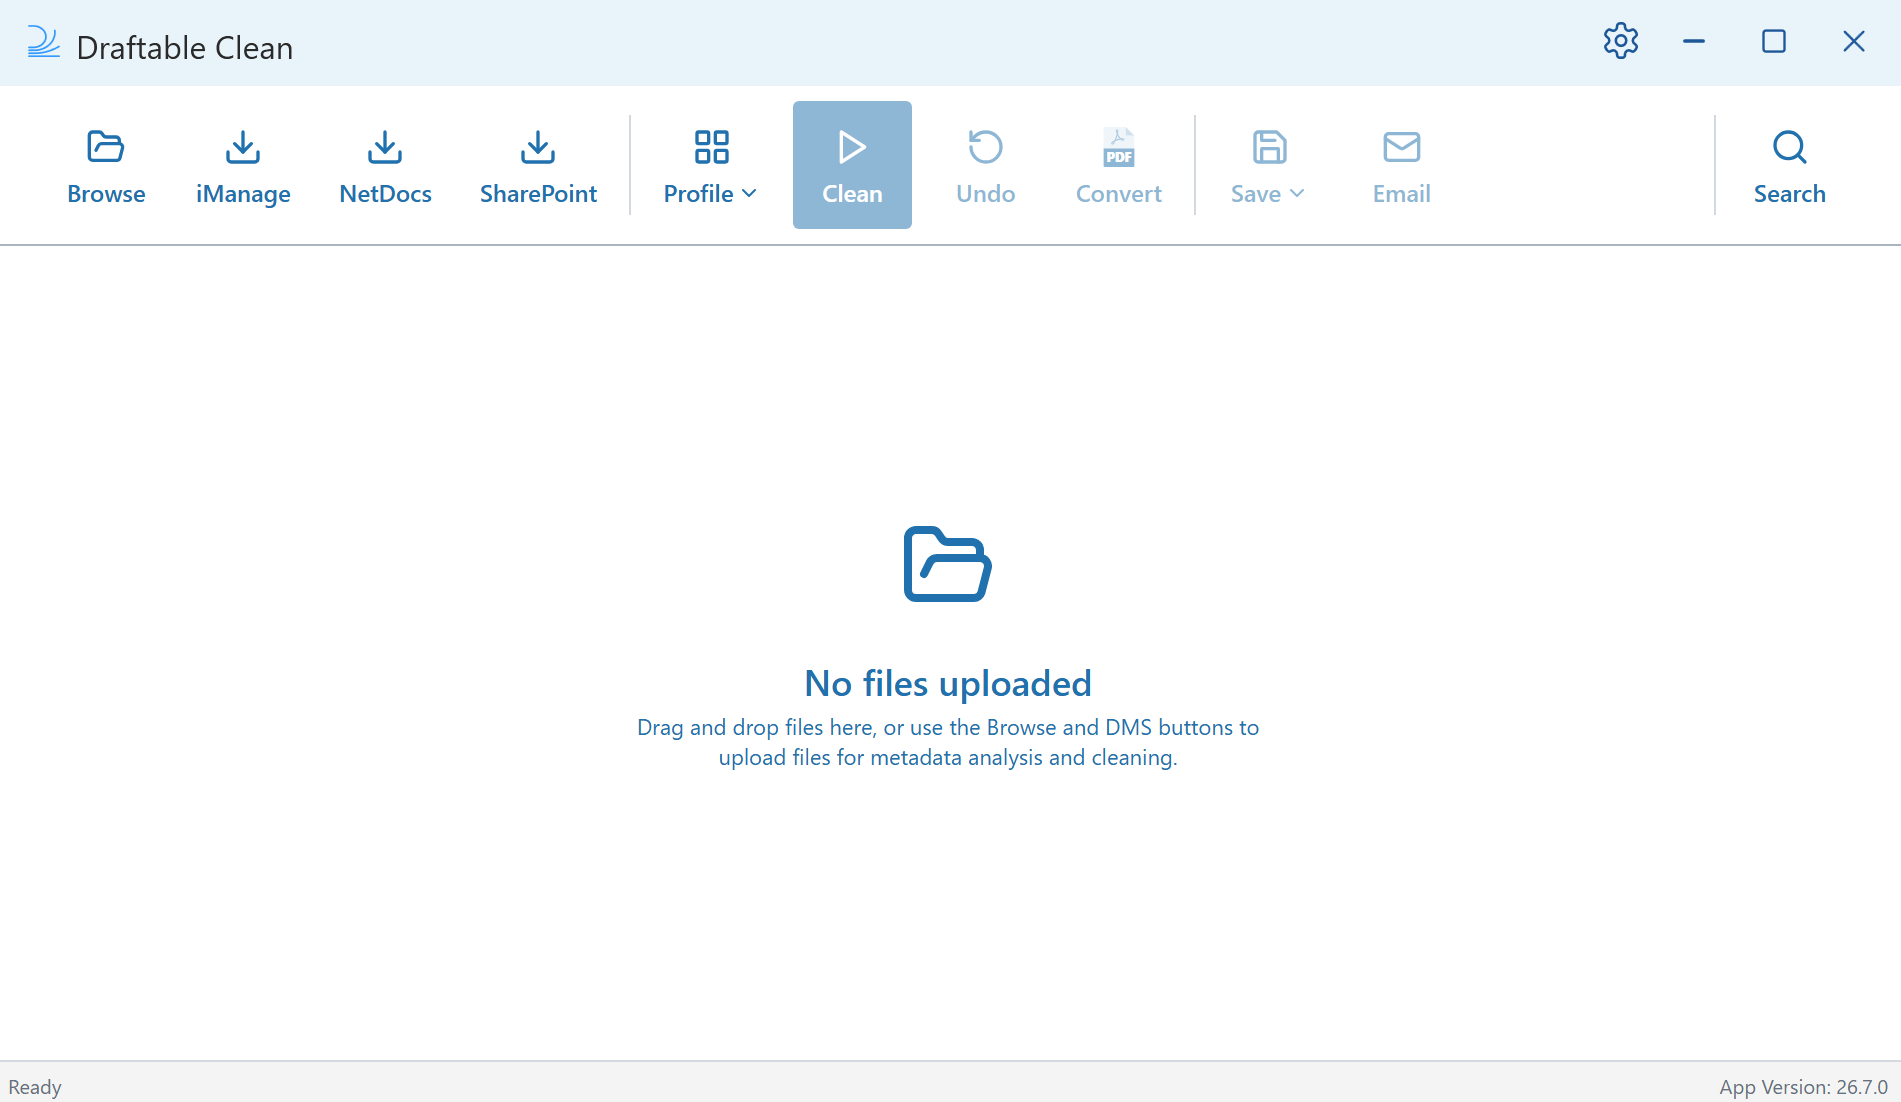
- Upload — Browse, iManage, NetDocs, SharePoint
- Clean — Clean, Undo
- Export — Save, Bundle, Email
1
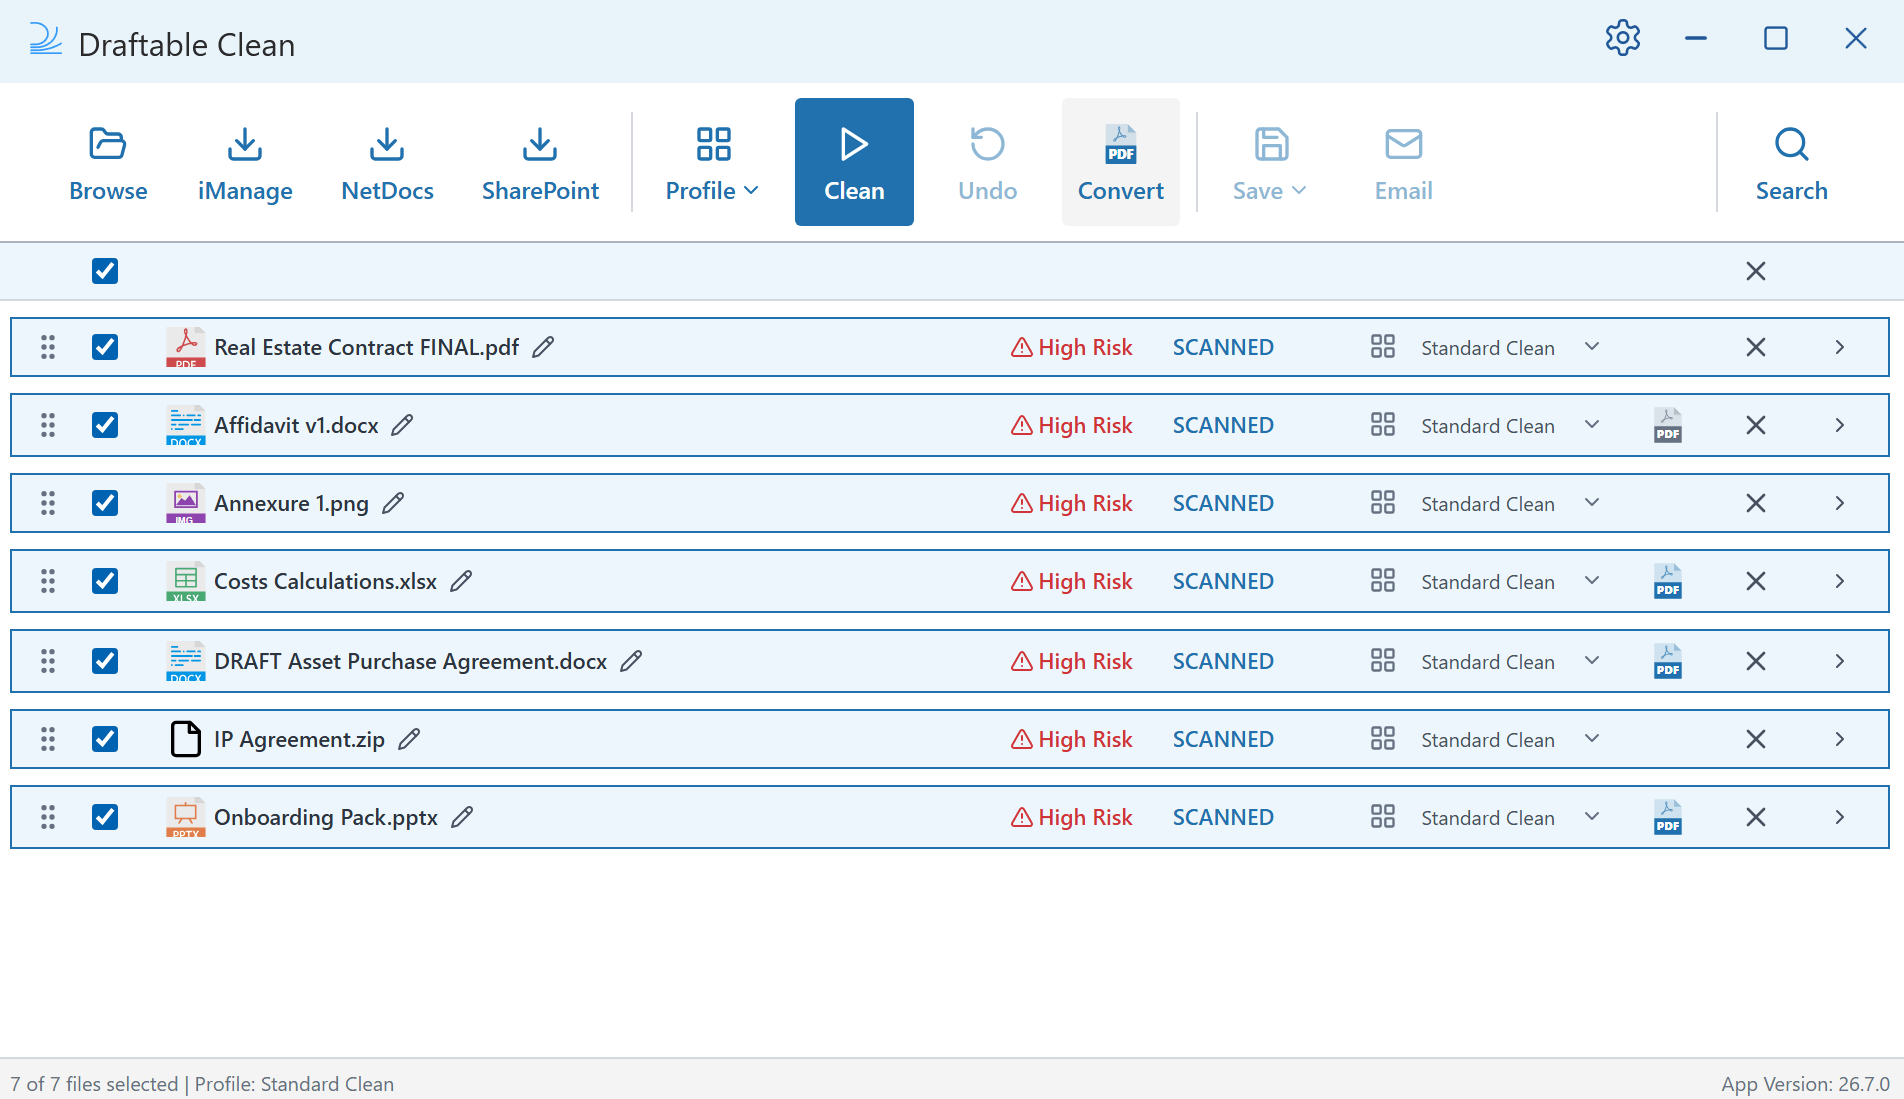
UPLOAD: Add files to Draftable Clean by clicking Browse to select documents from a local folder, iManage, NetDocs, or SharePoint to upload from your document management system, or by dragging and dropping files directly into the application window.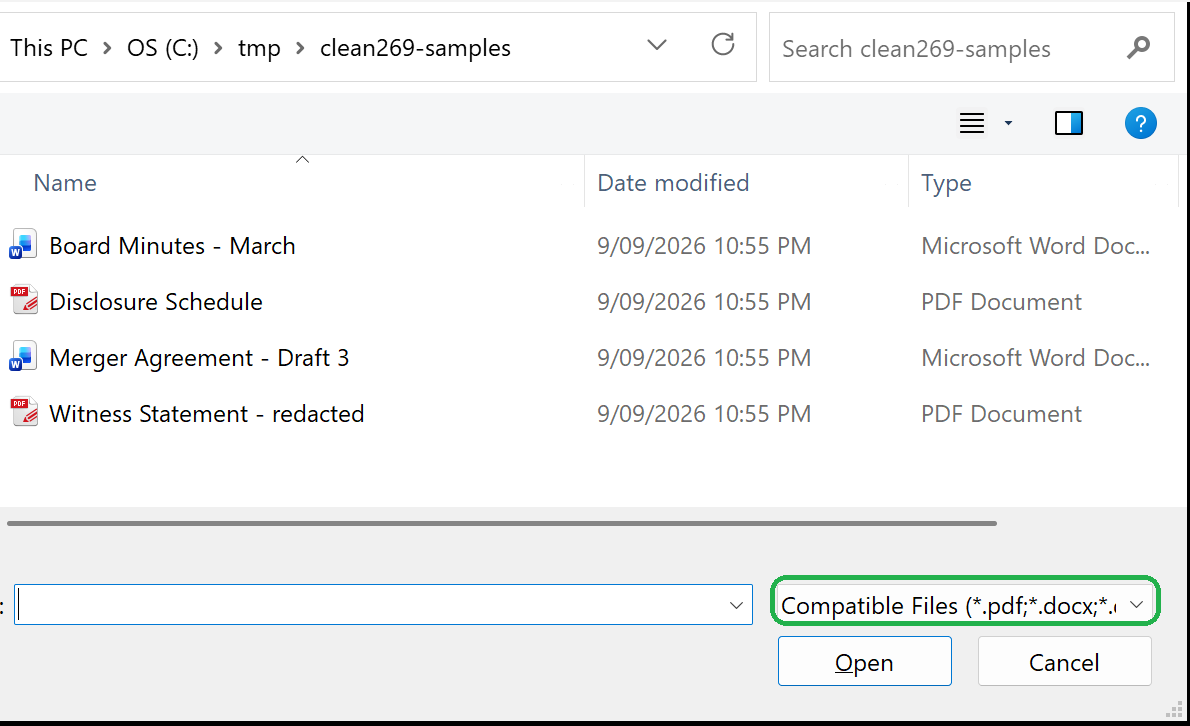
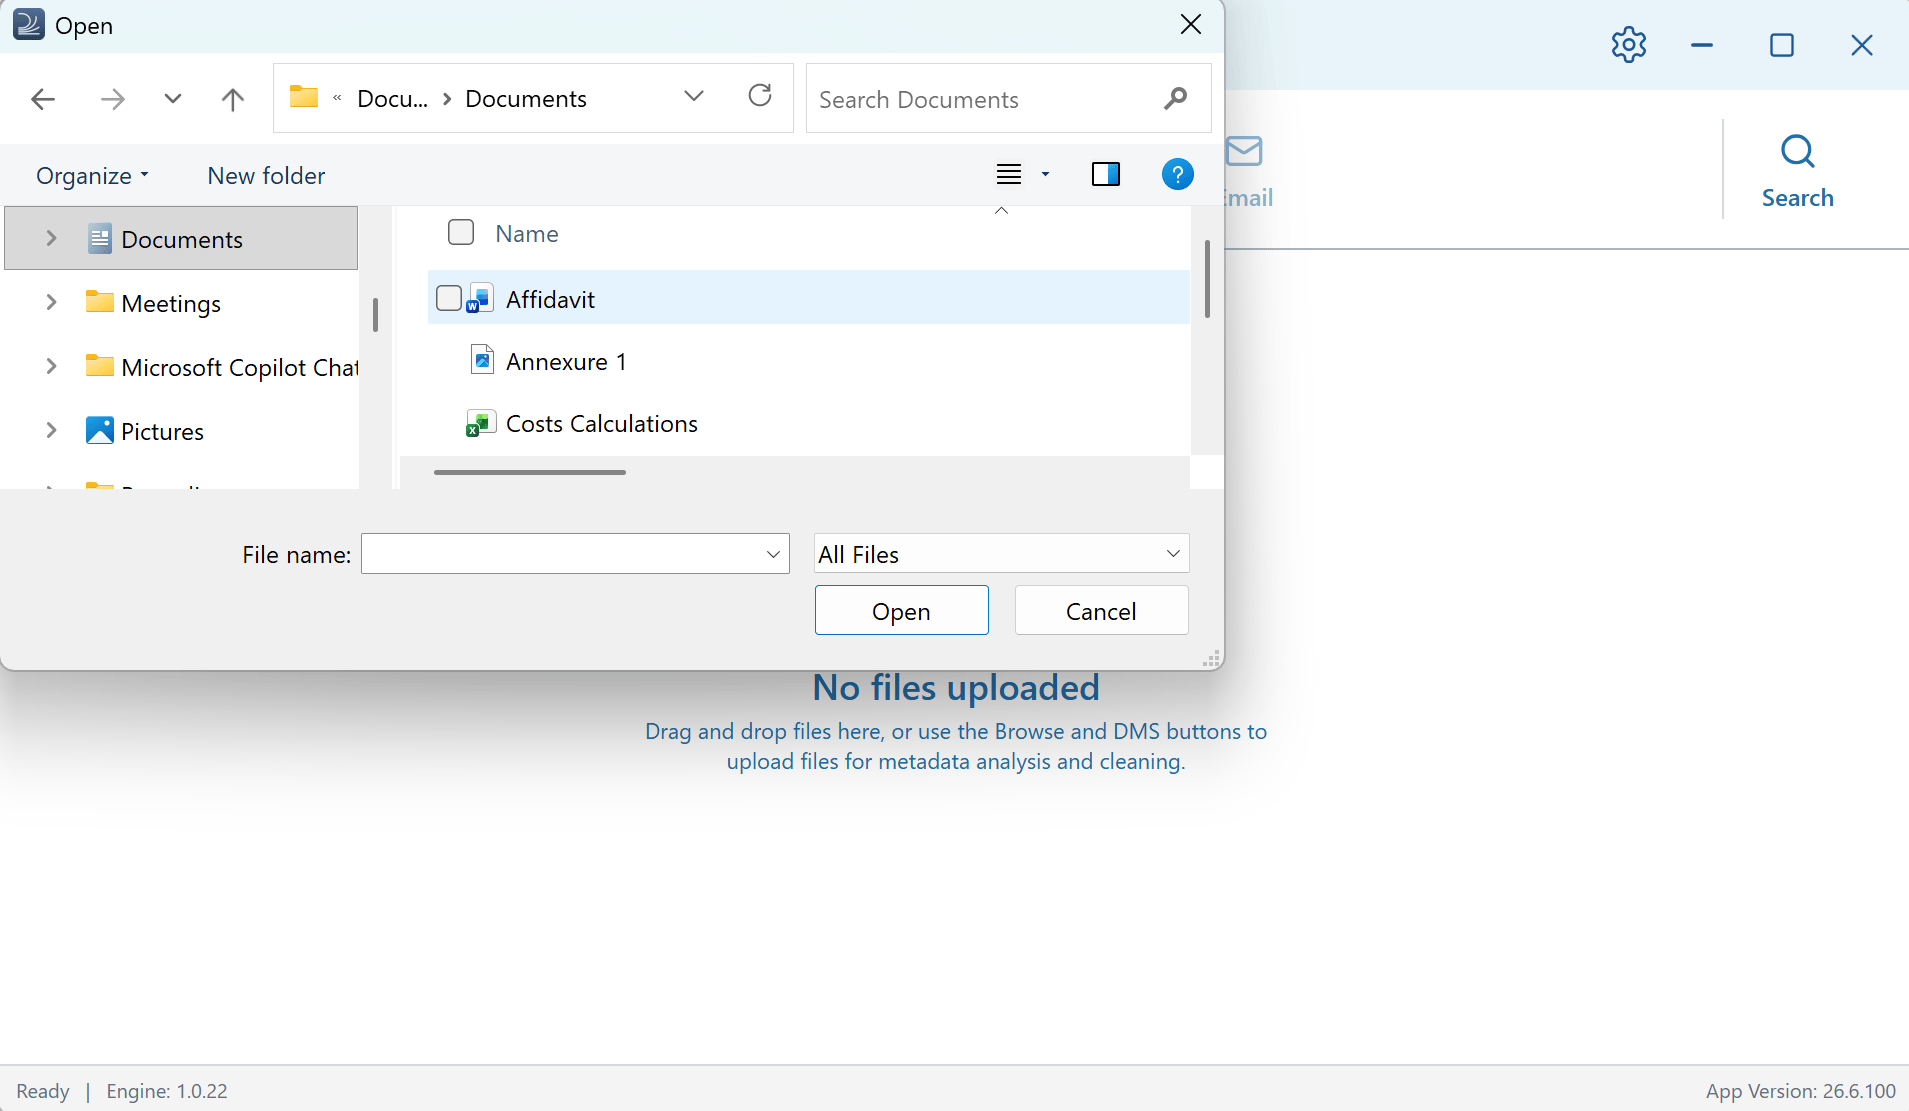
As of v26.9.0, the Browse dialog opens with the Compatible Files filter selected, so it shows only the file types Draftable Clean can scan and clean. If a file you are looking for is not listed, change the filter in the bottom-right of the dialog — All Files is still available at the end of the list.
2
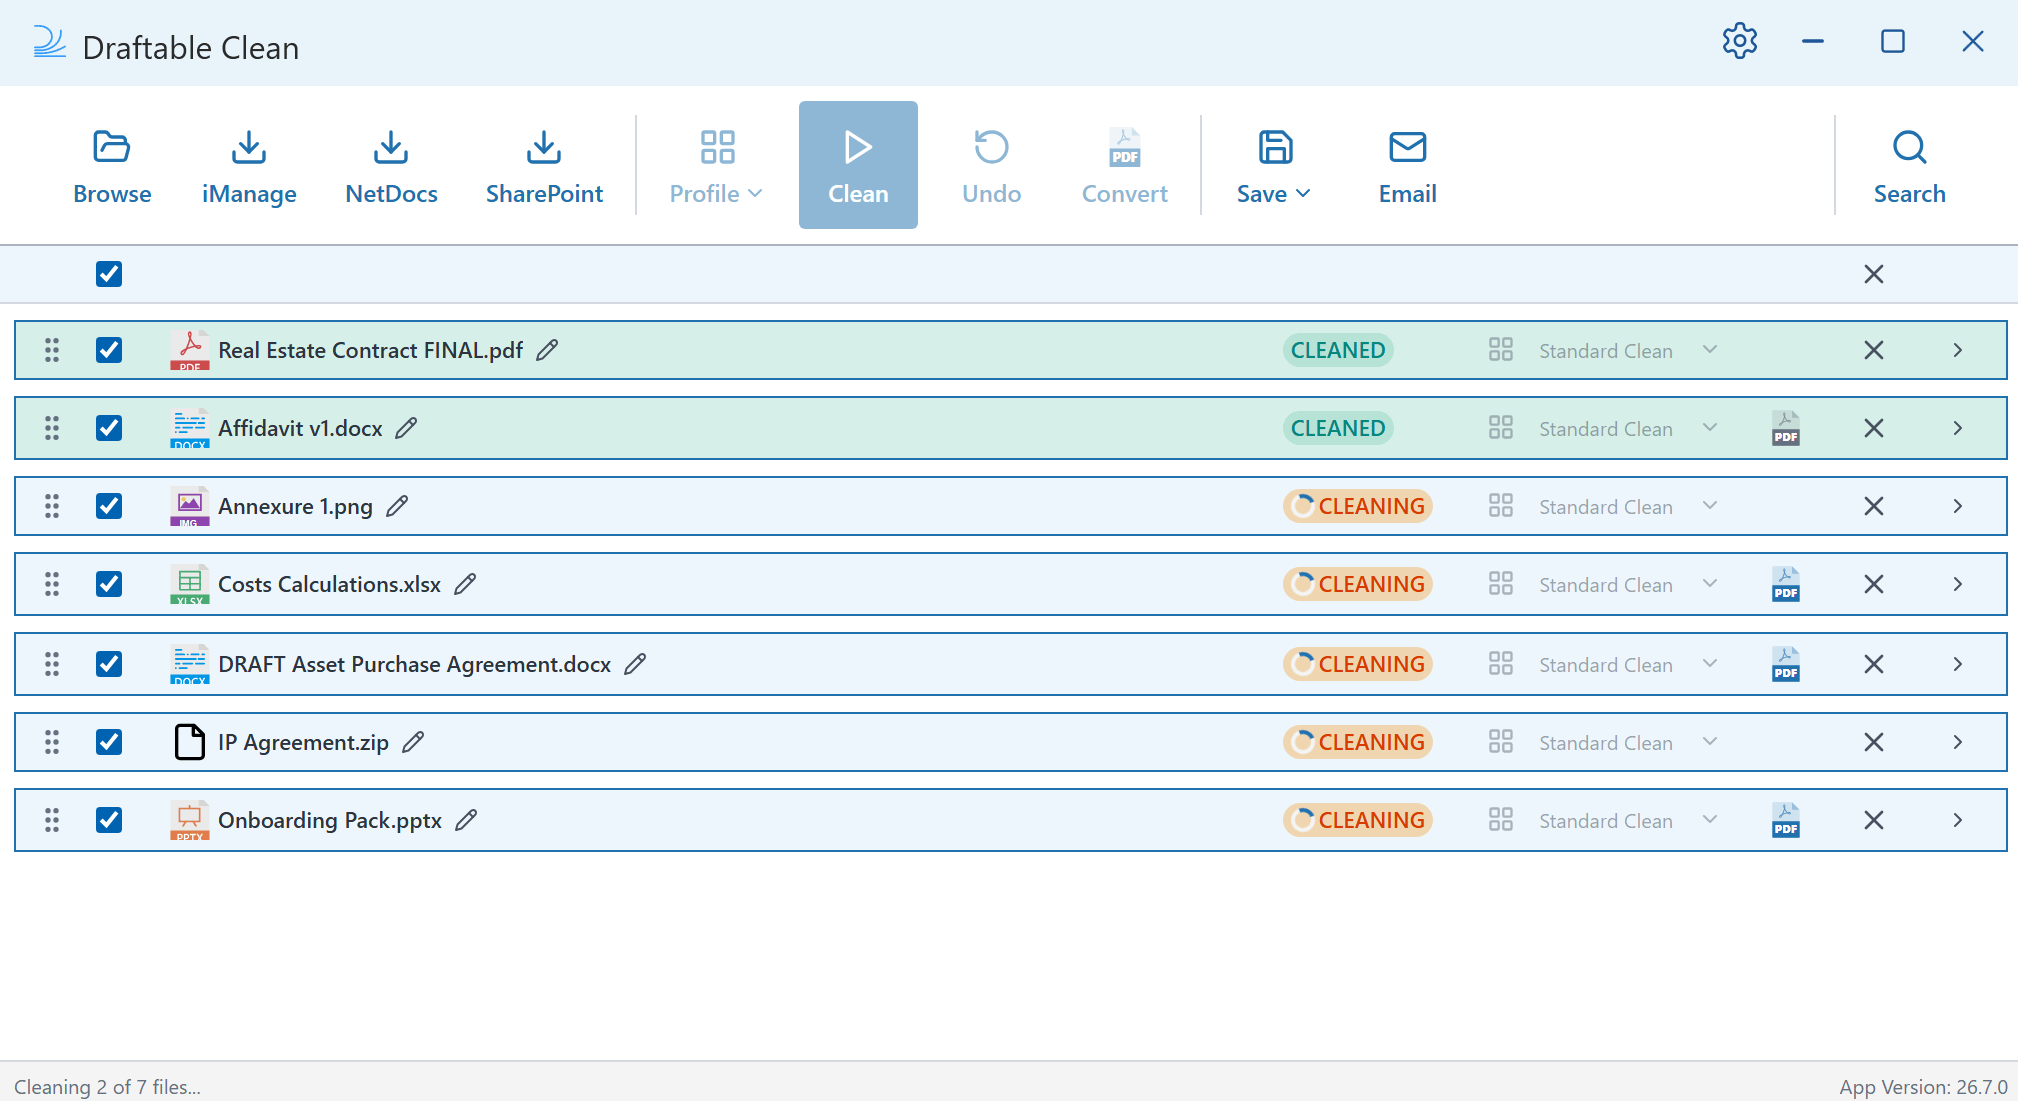
CLEAN: Once uploaded, files are automatically scanned and assigned a risk rating. When you are ready, click Clean in the toolbar. All selected files are cleaned and their status changes to CLEANED.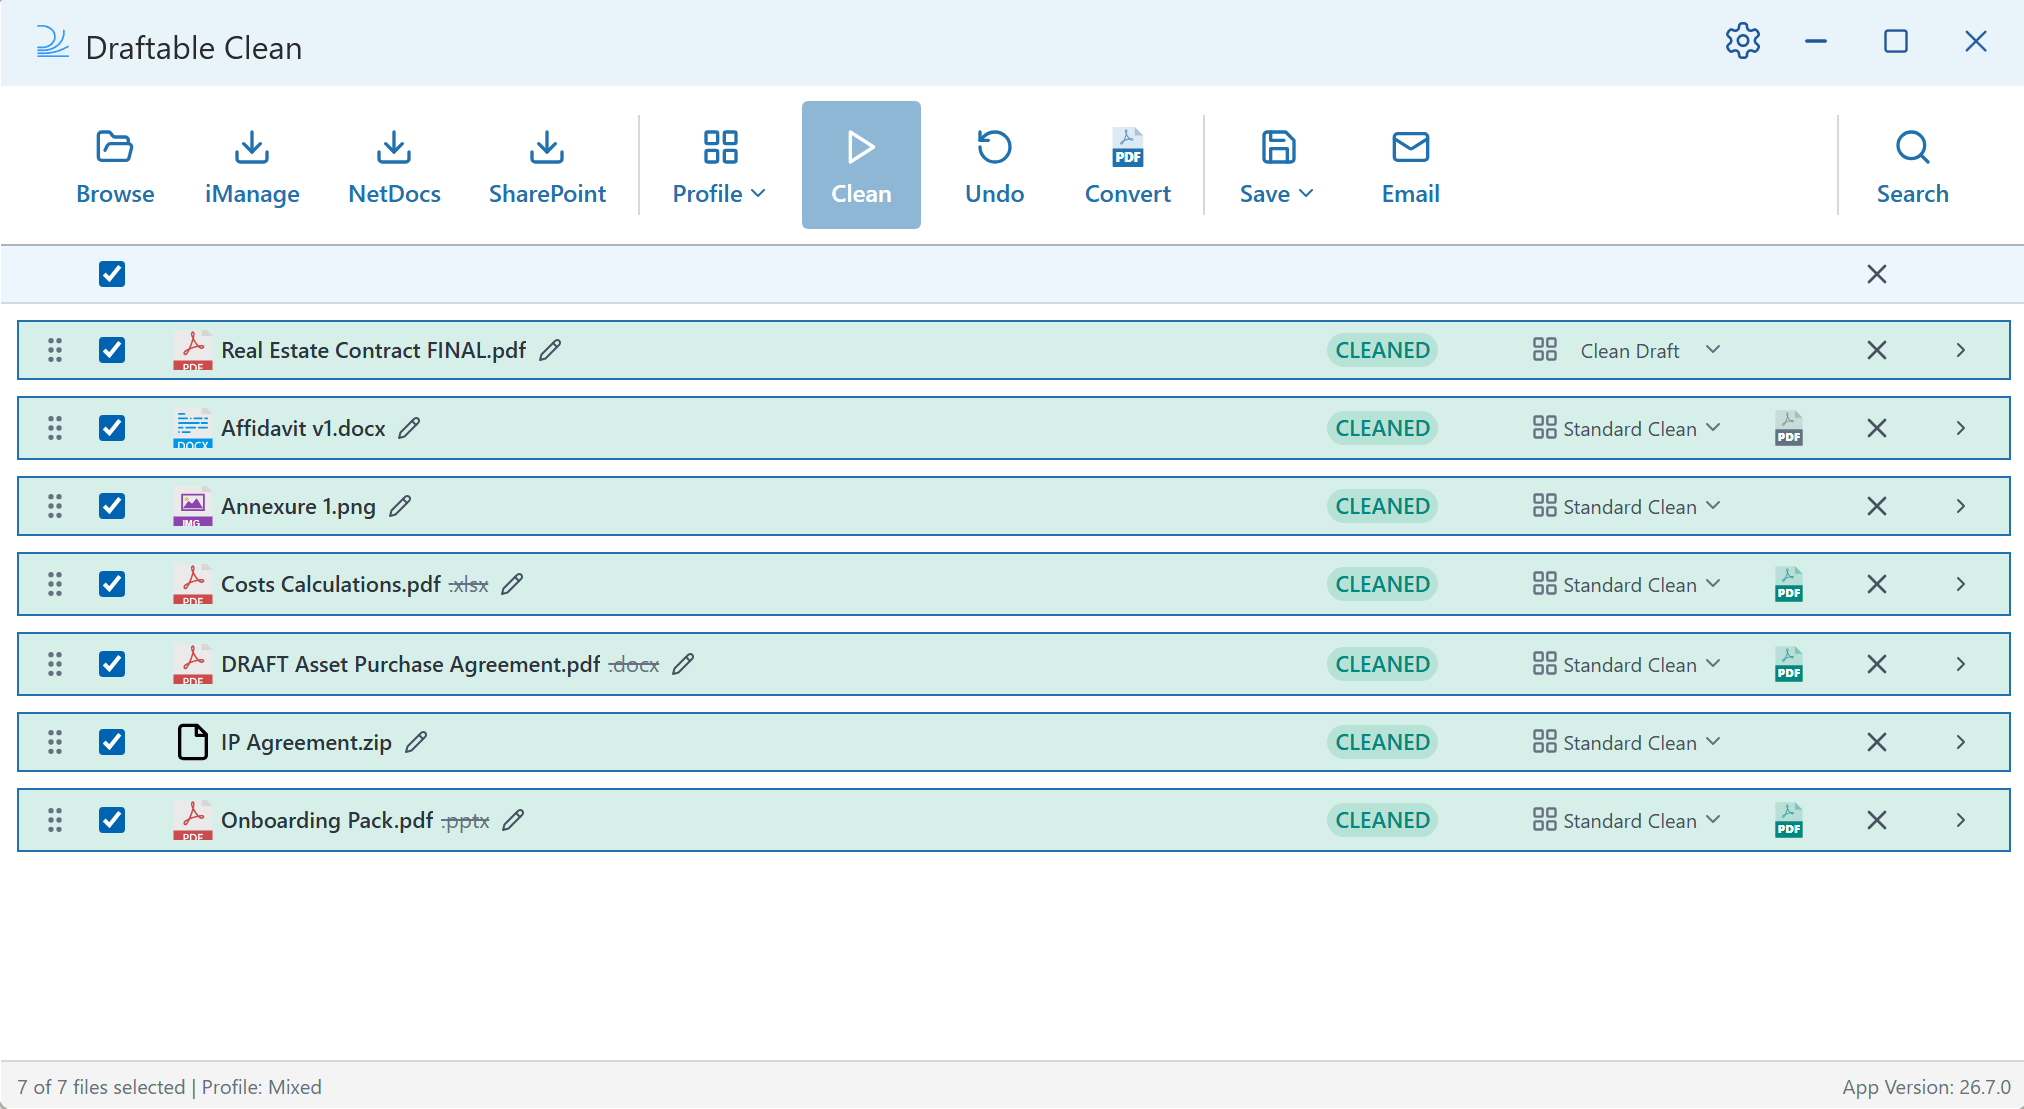
3
EXPORT: Save or share your cleaned files from the toolbar.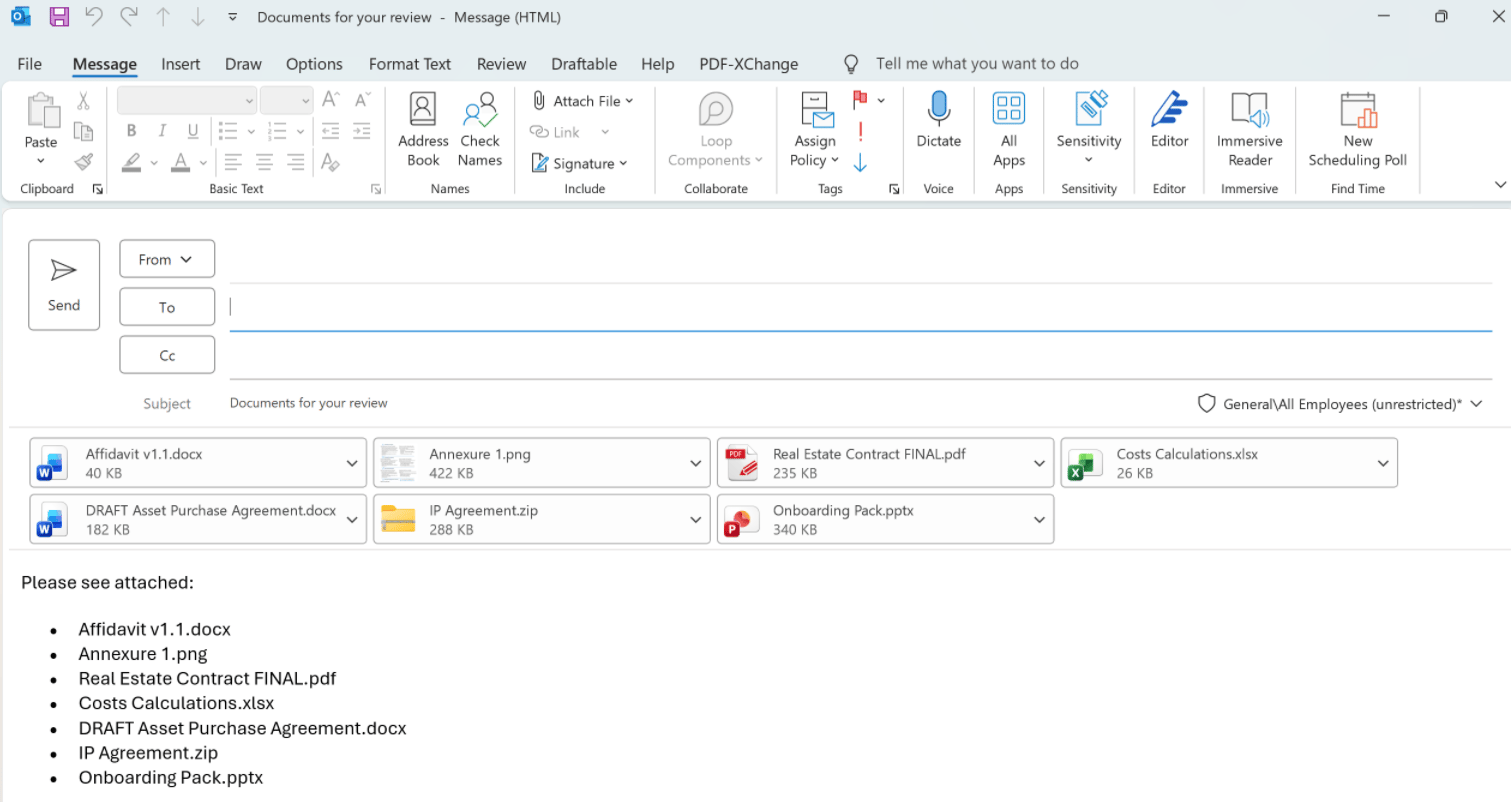
.png?fit=max&auto=format&n=UWnWsz4Ki4oPJdoe&q=85&s=4e59073b800249f8fa4abaa299e8d78d)
- Save — Save cleaned files to disk (packaged into a compressed ZIP folder with a timestamped filename) or back to your document management system (iManage, NetDocuments, or SharePoint).
- Bundle — Combines the selected files into a single PDF or ZIP. Added in v26.9.0 — see Bundling files into a single PDF or ZIP below.
- Email — Opens a new Outlook message with your cleaned files pre-attached. Draftable Clean preserves file order and any filenames you have renamed. As of v26.7.0, the subject and body are left blank unless a default has been configured — see Configuring email defaults below.
- Save (one by one) — Select where you would like each file to be saved individually.
- Save all to folder — Select a folder to save all cleaned files into as new files.
Saving as a new version to NetDocuments or SharePoint:
- NetDocuments — Select Save (one by one) and tick the Save as new version box when each file’s dialog box appears.
- SharePoint — Save the file into the destination folder using the same name as the existing file. For example, saving
document.docxinto a folder that already containsdocument.docxsaves it as a new version; using a different name saves it as a new file.
NdDocumentId custom property to documents it stores. Draftable Clean detects and removes that property when you clean the file. When you save the cleaned file back to NetDocuments, NetDocuments writes NdDocumentId on again. That is expected NetDocuments behaviour, not a cleaning failure.Bundling files into a single PDF or ZIP
Bundling was added in v26.9.0.
- Create PDF bundle — Combines the selected files into one PDF. Word, PowerPoint, and Excel files are converted to PDF as part of the process, so a mixed set of documents still produces a single continuous PDF. The result appears in the file list as PDF bundle.pdf.
- Create ZIP bundle — Packs the selected files into a single ZIP archive, which also appears in the file list, named
cleaned-files-followed by today’s date.
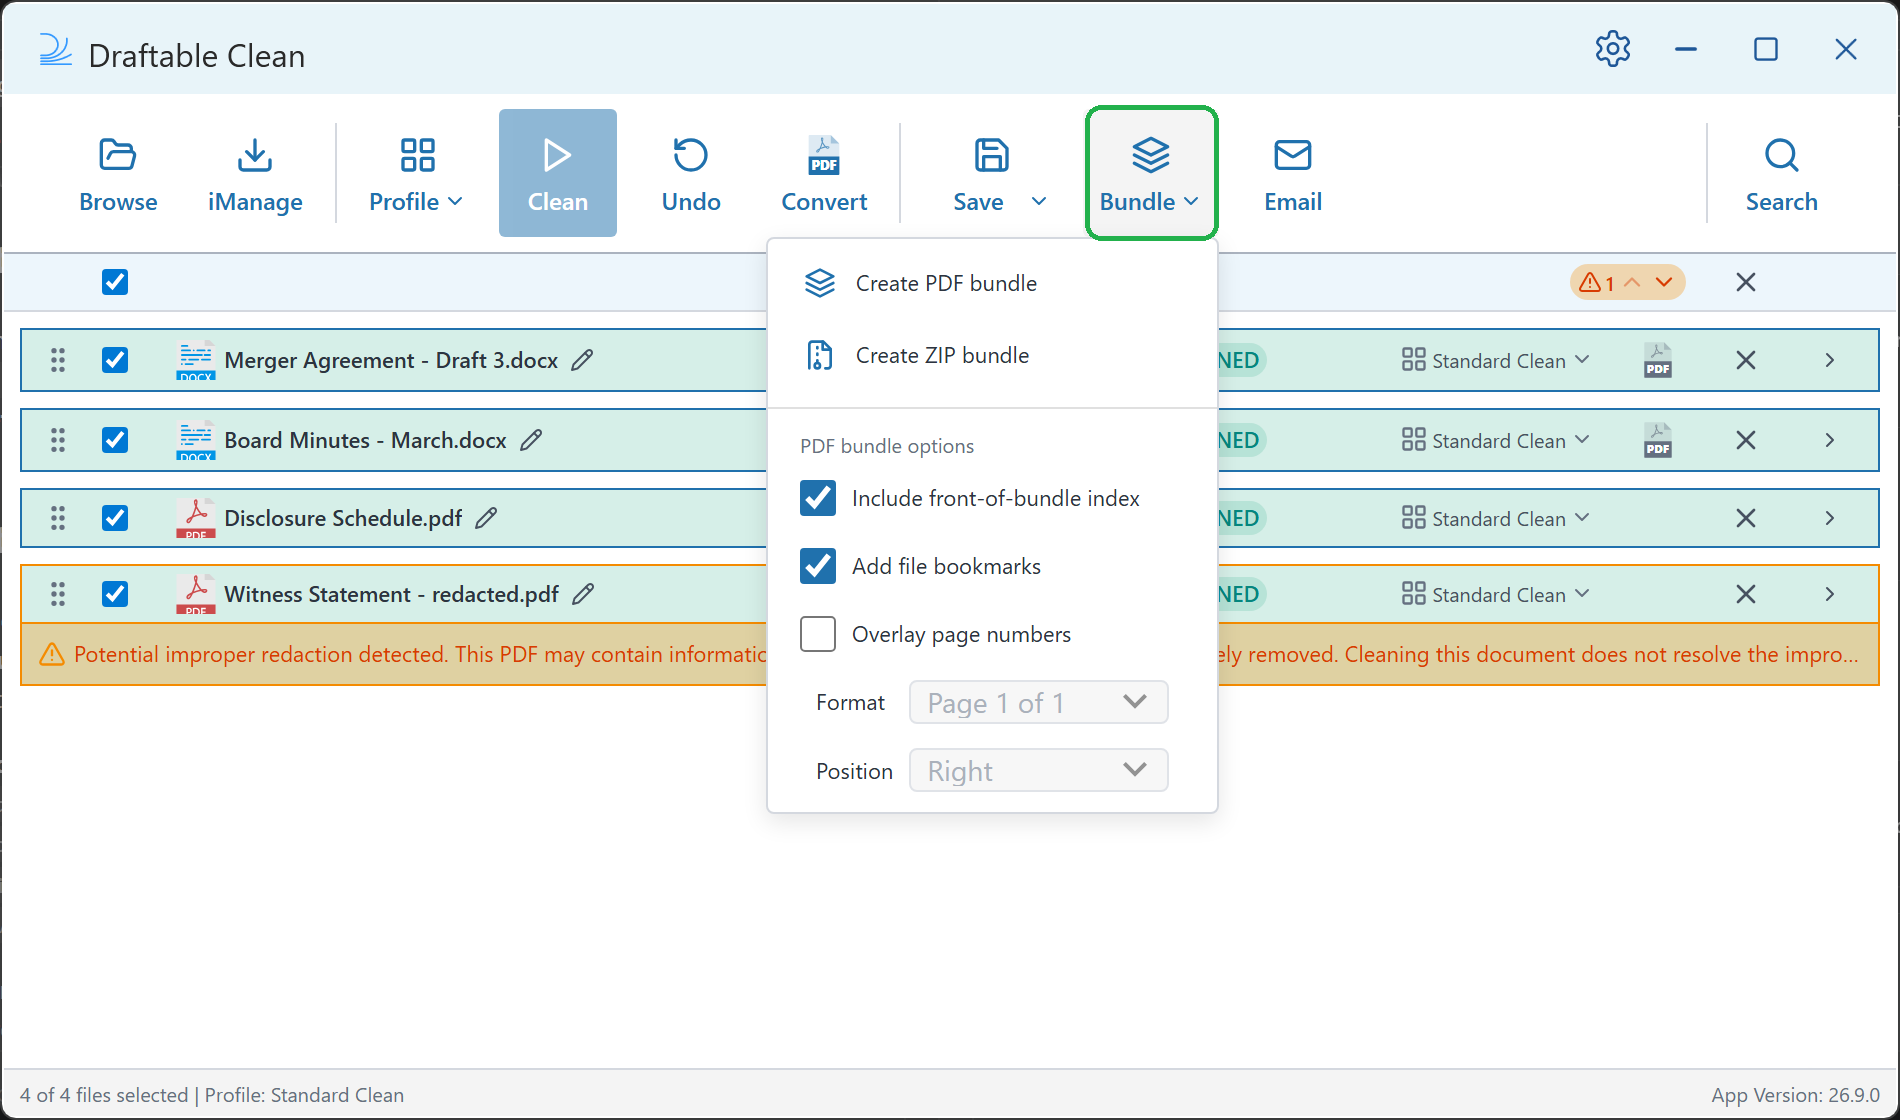
The Bundle button becomes available once your files have been cleaned.
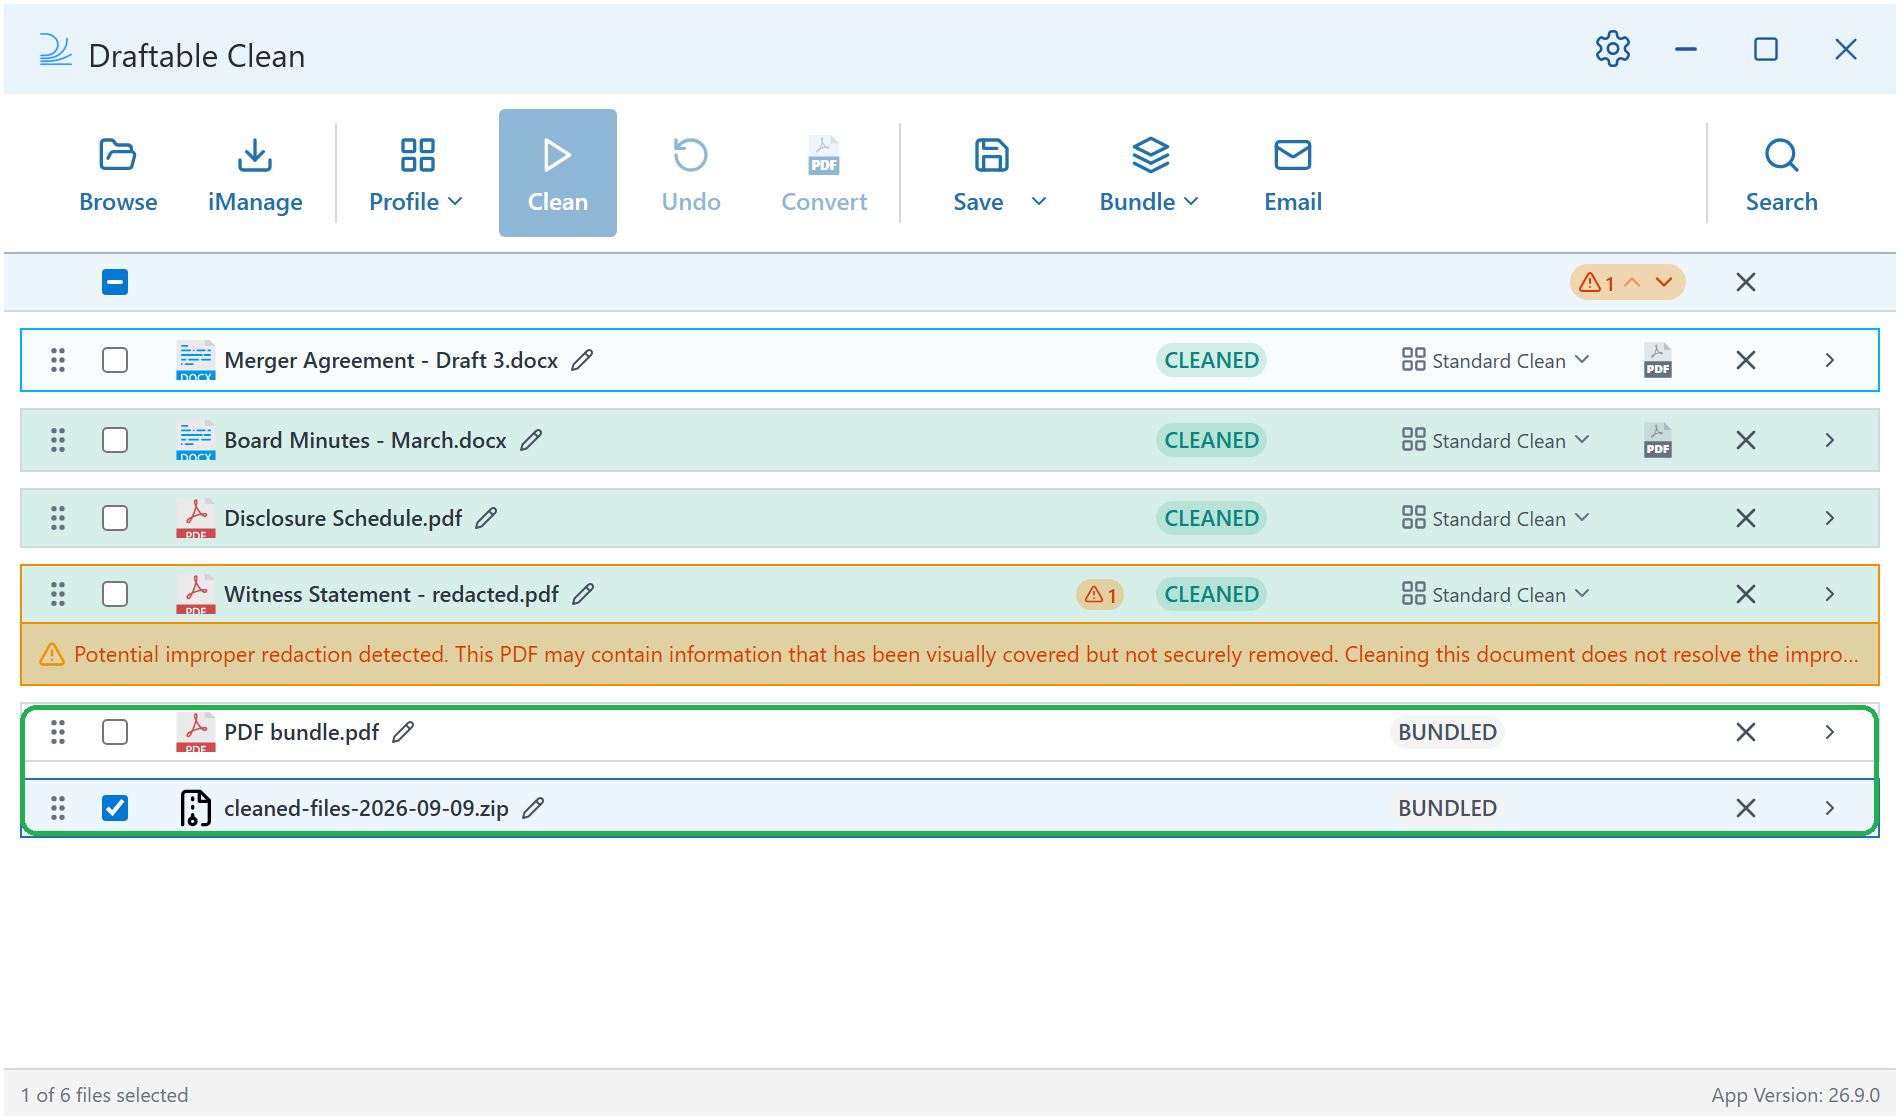
If any selected file cannot be added — because it is locked behind a password, cannot be read, or fails to convert — no bundle is created at all, and Draftable Clean names the files that caused the problem. A bundle is never produced with files quietly missing from it. Resolve the listed files, or deselect them, and create the bundle again.
PDF bundle options
The Bundle menu also carries the options that apply to PDF bundles:- Include front-of-bundle index — Adds a table-of-contents page at the start of the bundle, listing each combined file and the page it starts on. On by default.
- Add file bookmarks — Adds a PDF bookmark for each file, so you can jump between documents in your PDF reader. On by default.
- Overlay page numbers — Stamps continuous page numbers across the bundle. Off by default. When enabled, the Format and Position controls below it become available.
Position places the number at the Left, Center, or Right of the footer. Right is the default.
Page numbers are stamped alongside any numbering already in the source documents. Draftable Clean does not remove or renumber the original page numbers.
Configuring email defaults
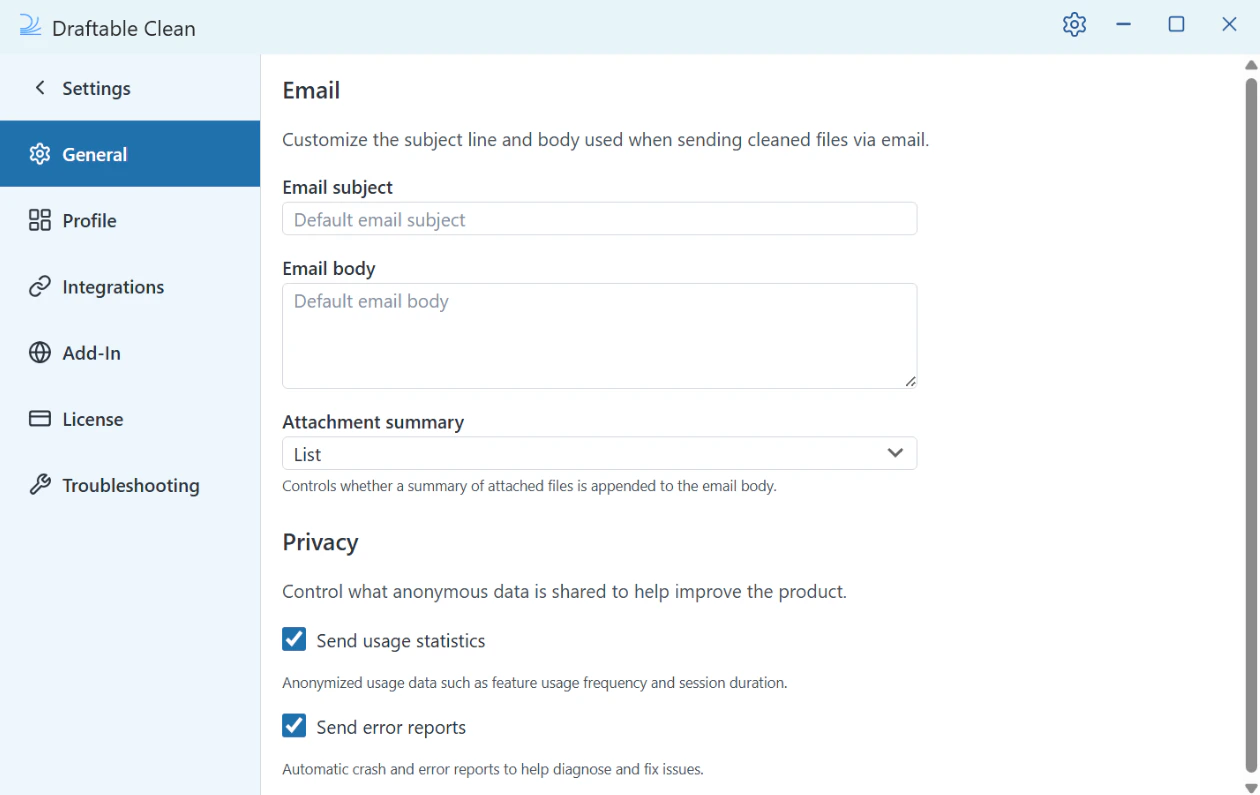
In Settings > General, you can prepare defaults for emails sent from the desktop application:- Email subject — The default subject line
- Email body — The default body text
- Attachment summary — Whether a List (bullet points) or Table (with columns) of attachments is inserted into the email body
If no subject or body default is set, prepared emails open blank so you can write your own. Earlier versions inserted a “Cleaned Document” subject automatically. Administrators can configure these defaults centrally for an organisation — see Configuring preferences for your organisation.
Password-protected files
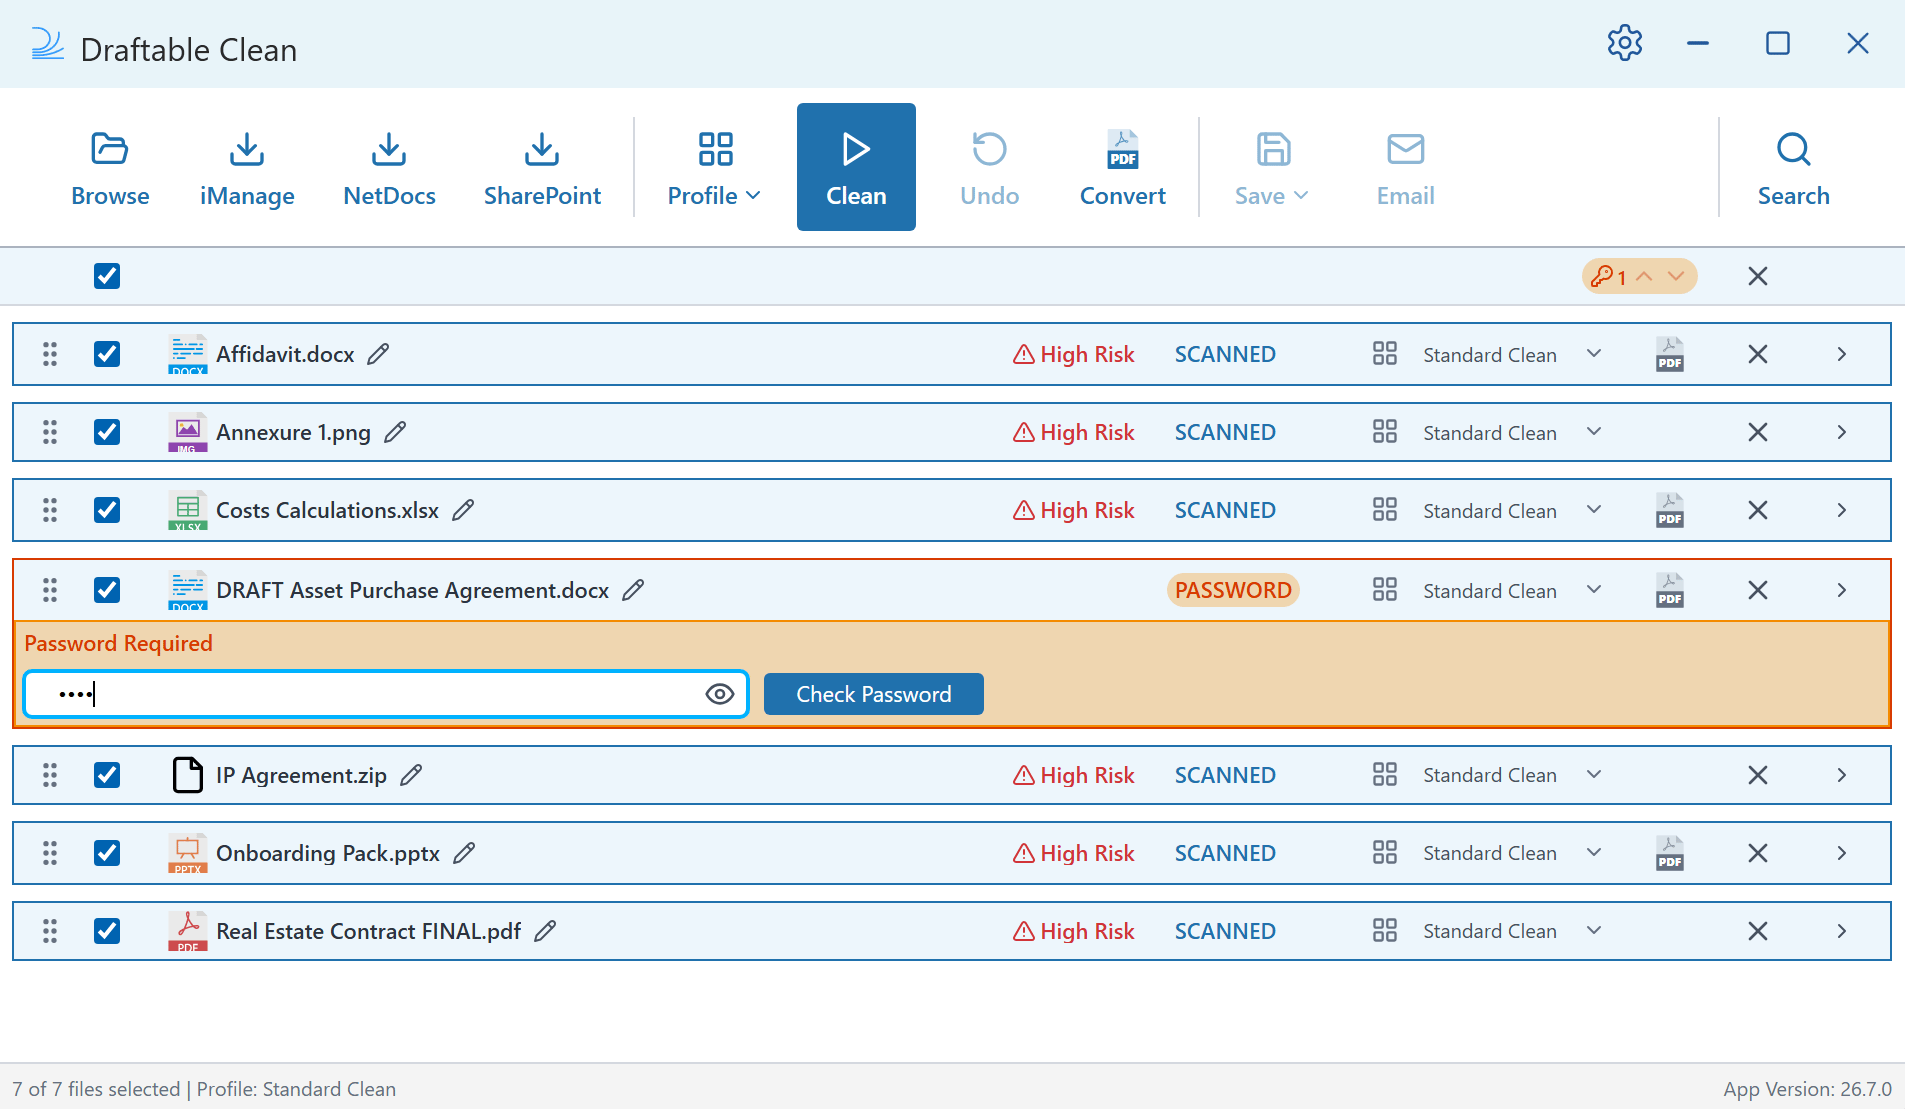
If a file shows a PASSWORD status (highlighted in orange), it is password-protected and cannot be scanned until you provide the password. A Password Required prompt appears automatically below the file with a password field.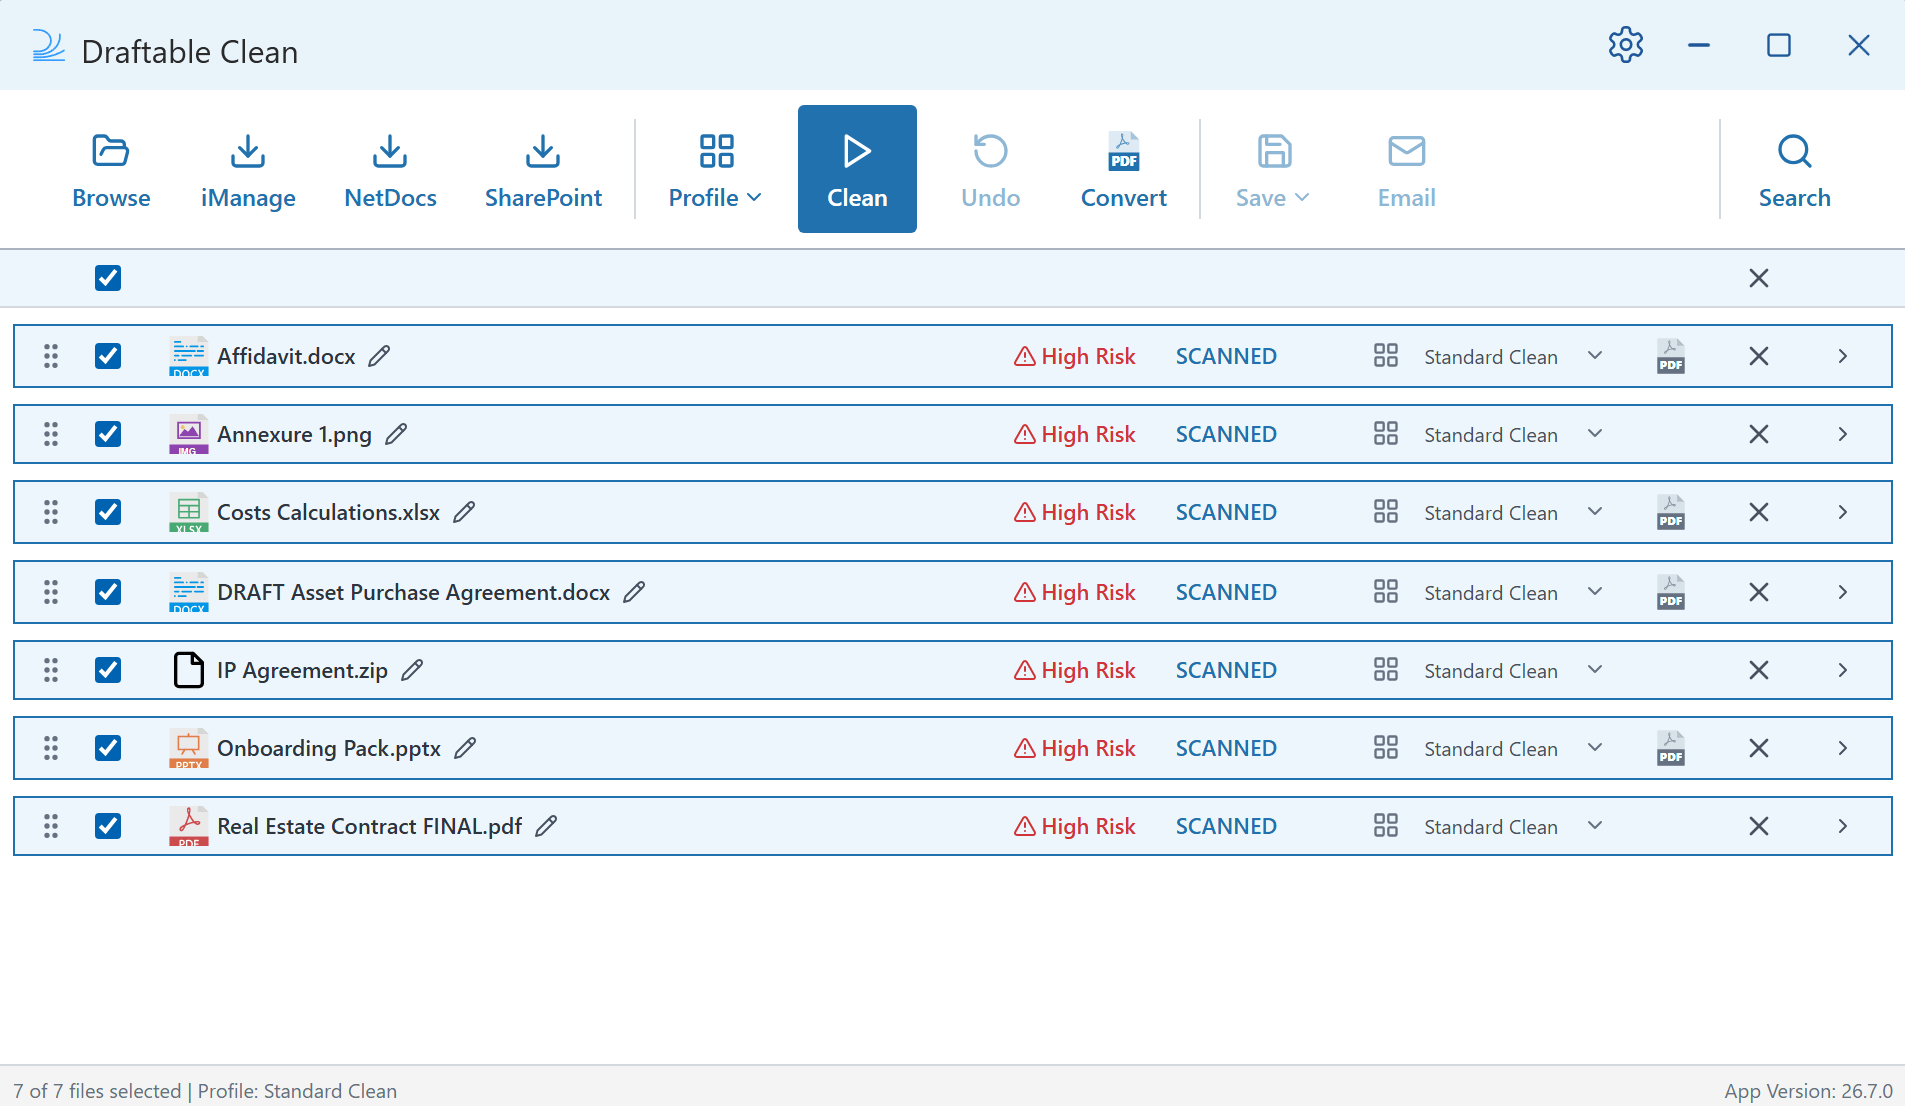
Reviewing metadata in files
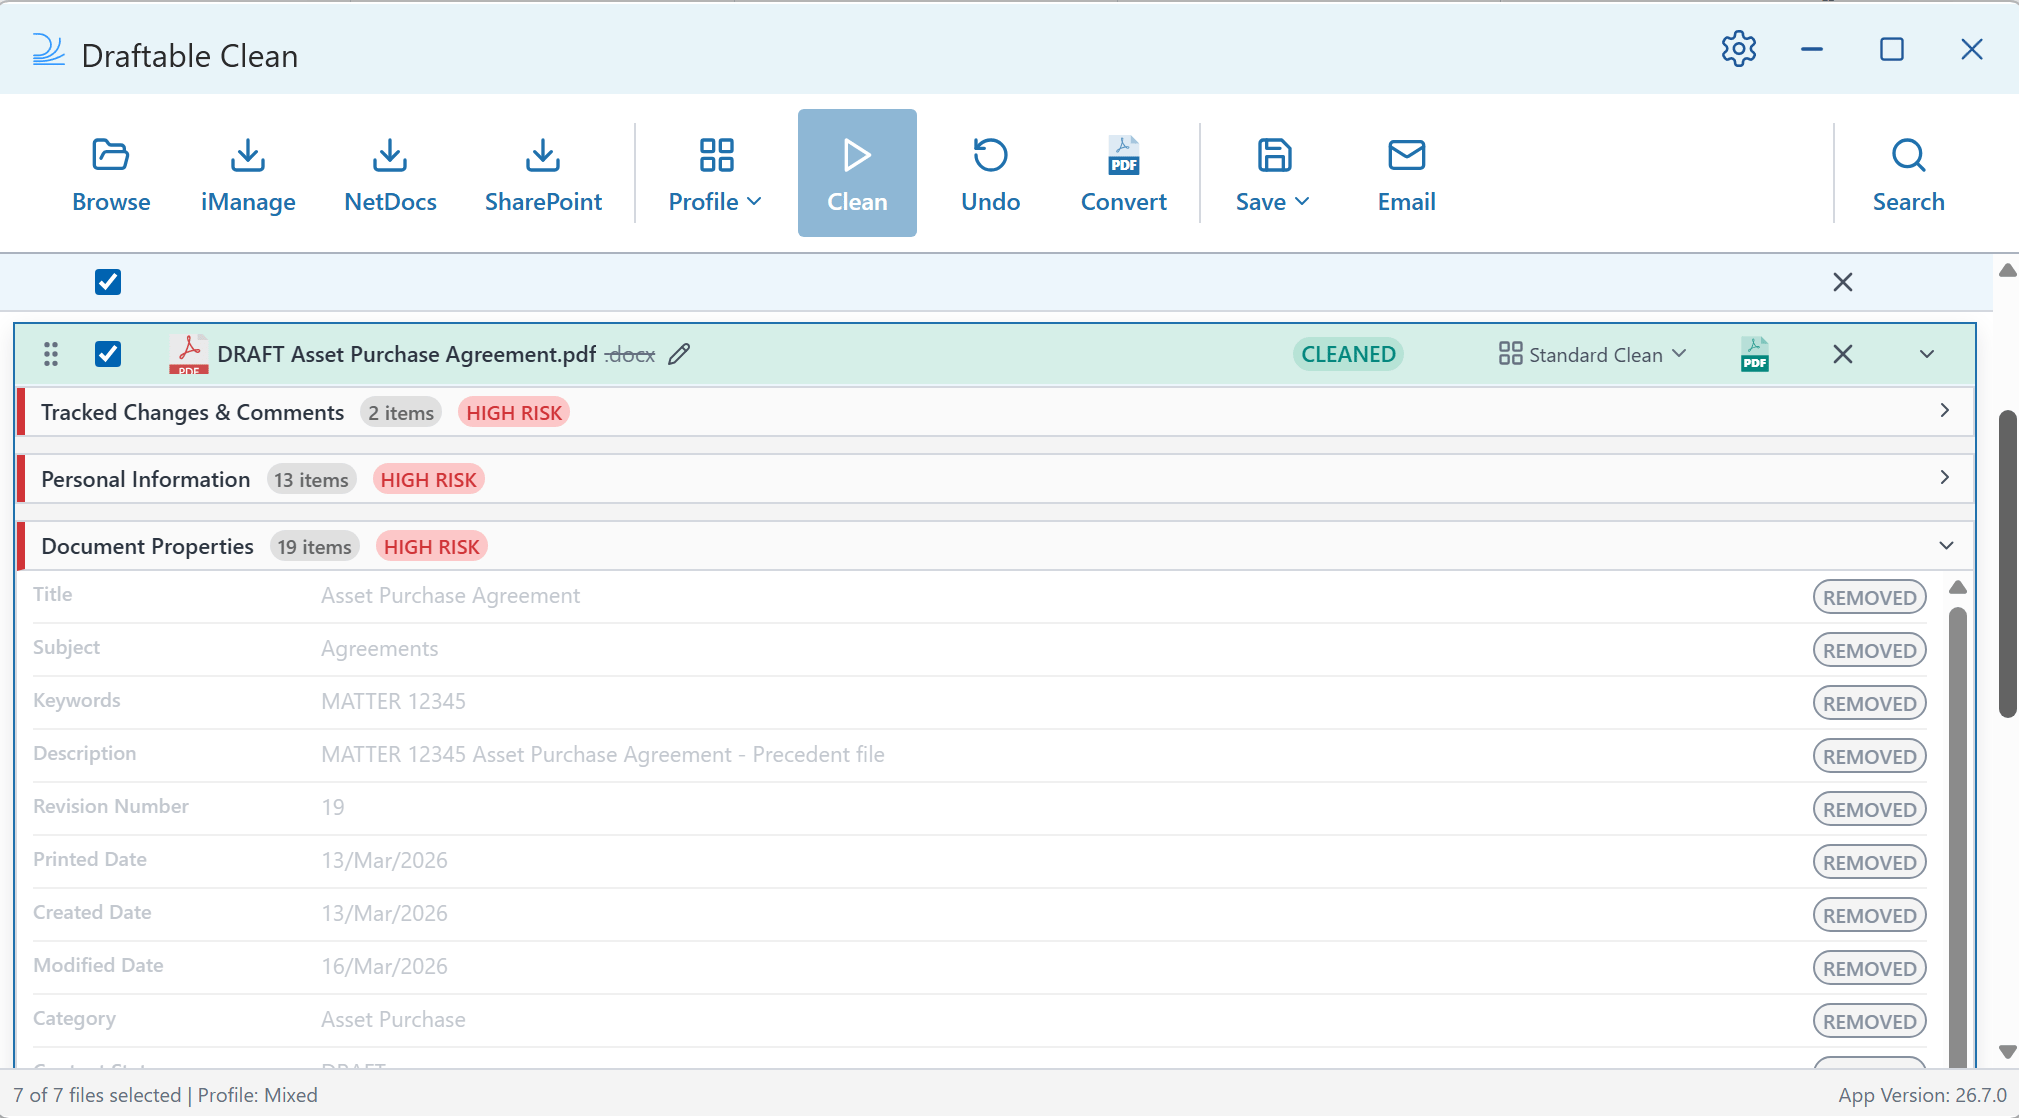
Click the expand arrow (>) on any file to see a detailed breakdown of its metadata. Metadata is grouped into categories — such as Document Properties, Personal Information, Tracked Changes & Comments, and more — each with their own item count and risk level.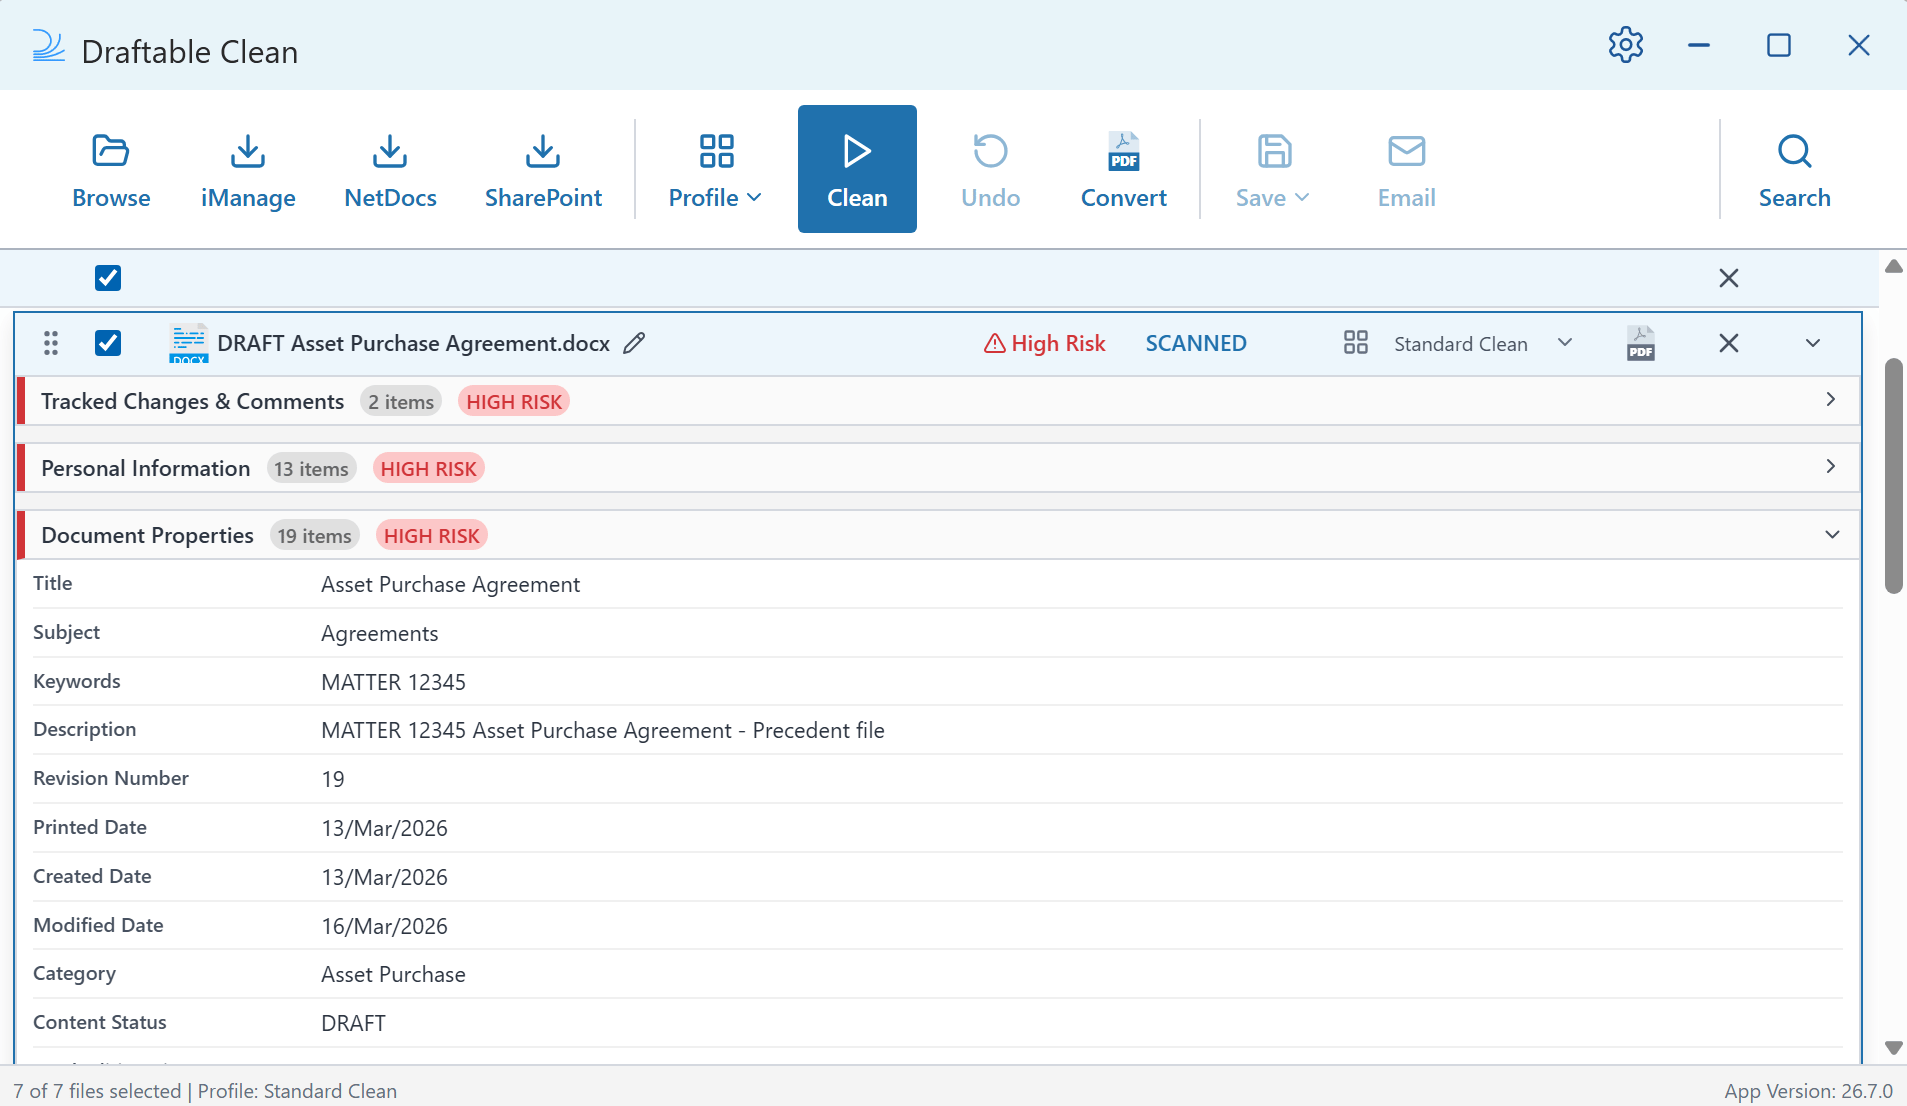
Searching metadata in files
Use the search bar above the file list to find specific metadata across all loaded files. This helps you locate particular fields — such as author names or tracked changes — before you clean or export.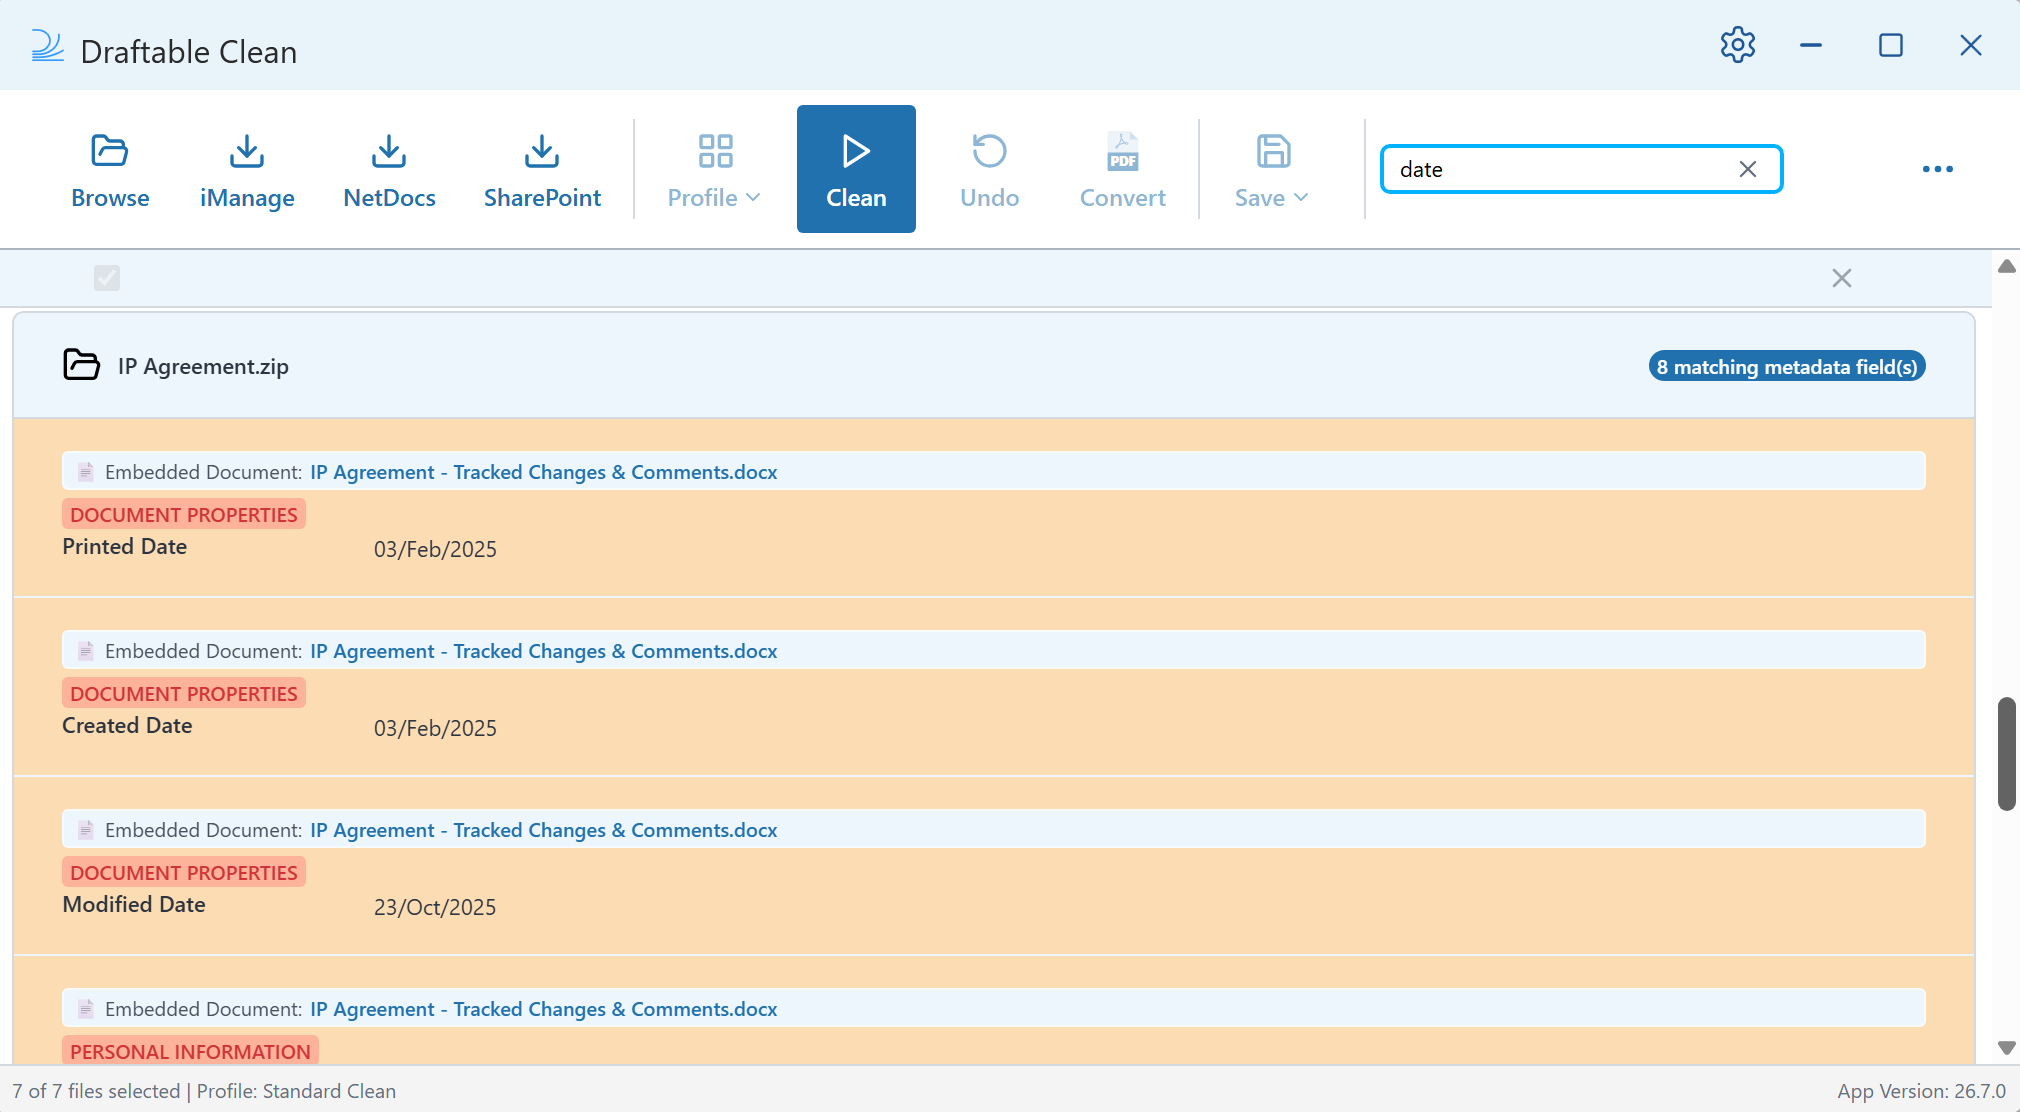
Renaming and reordering files
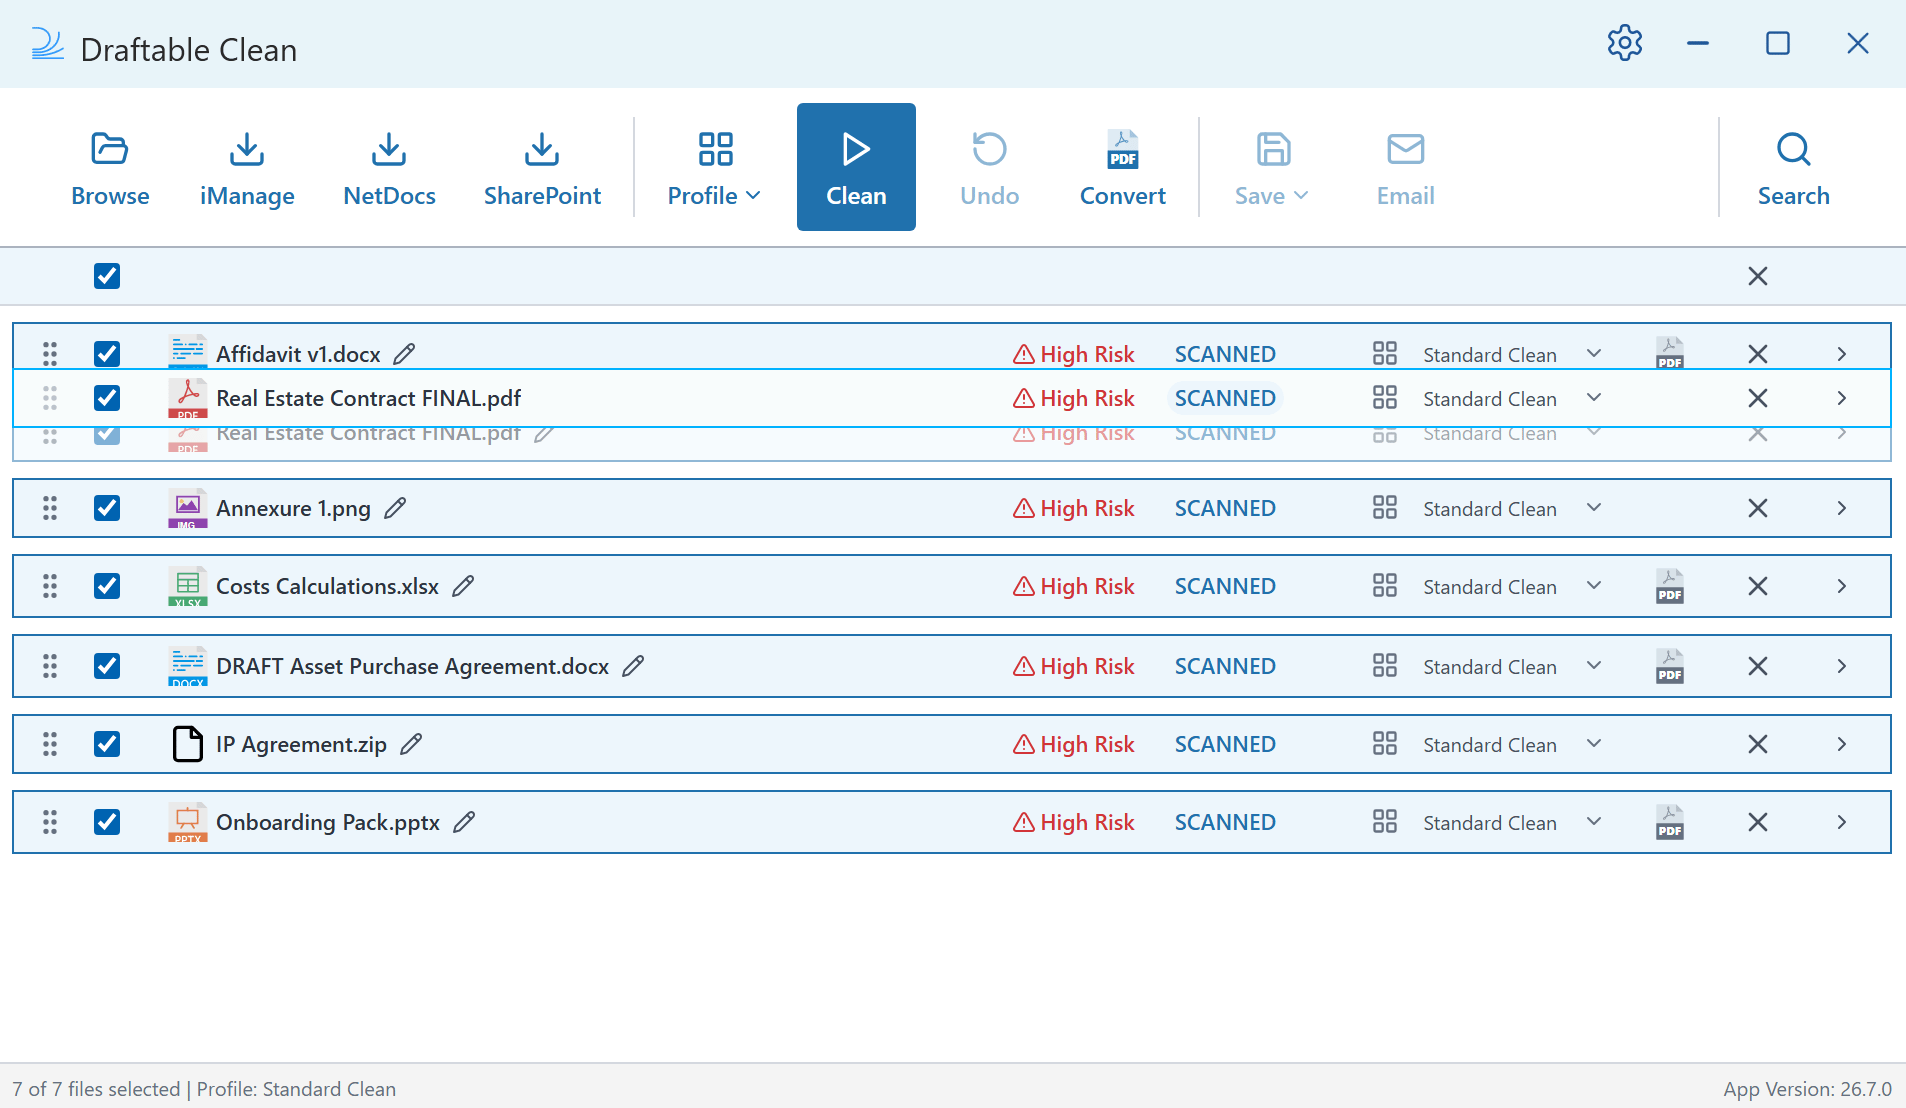
Rename and reorder files directly in the file list before cleaning:- Rename — Click the pencil icon next to a file name to edit it inline. Press Enter or click away to confirm.
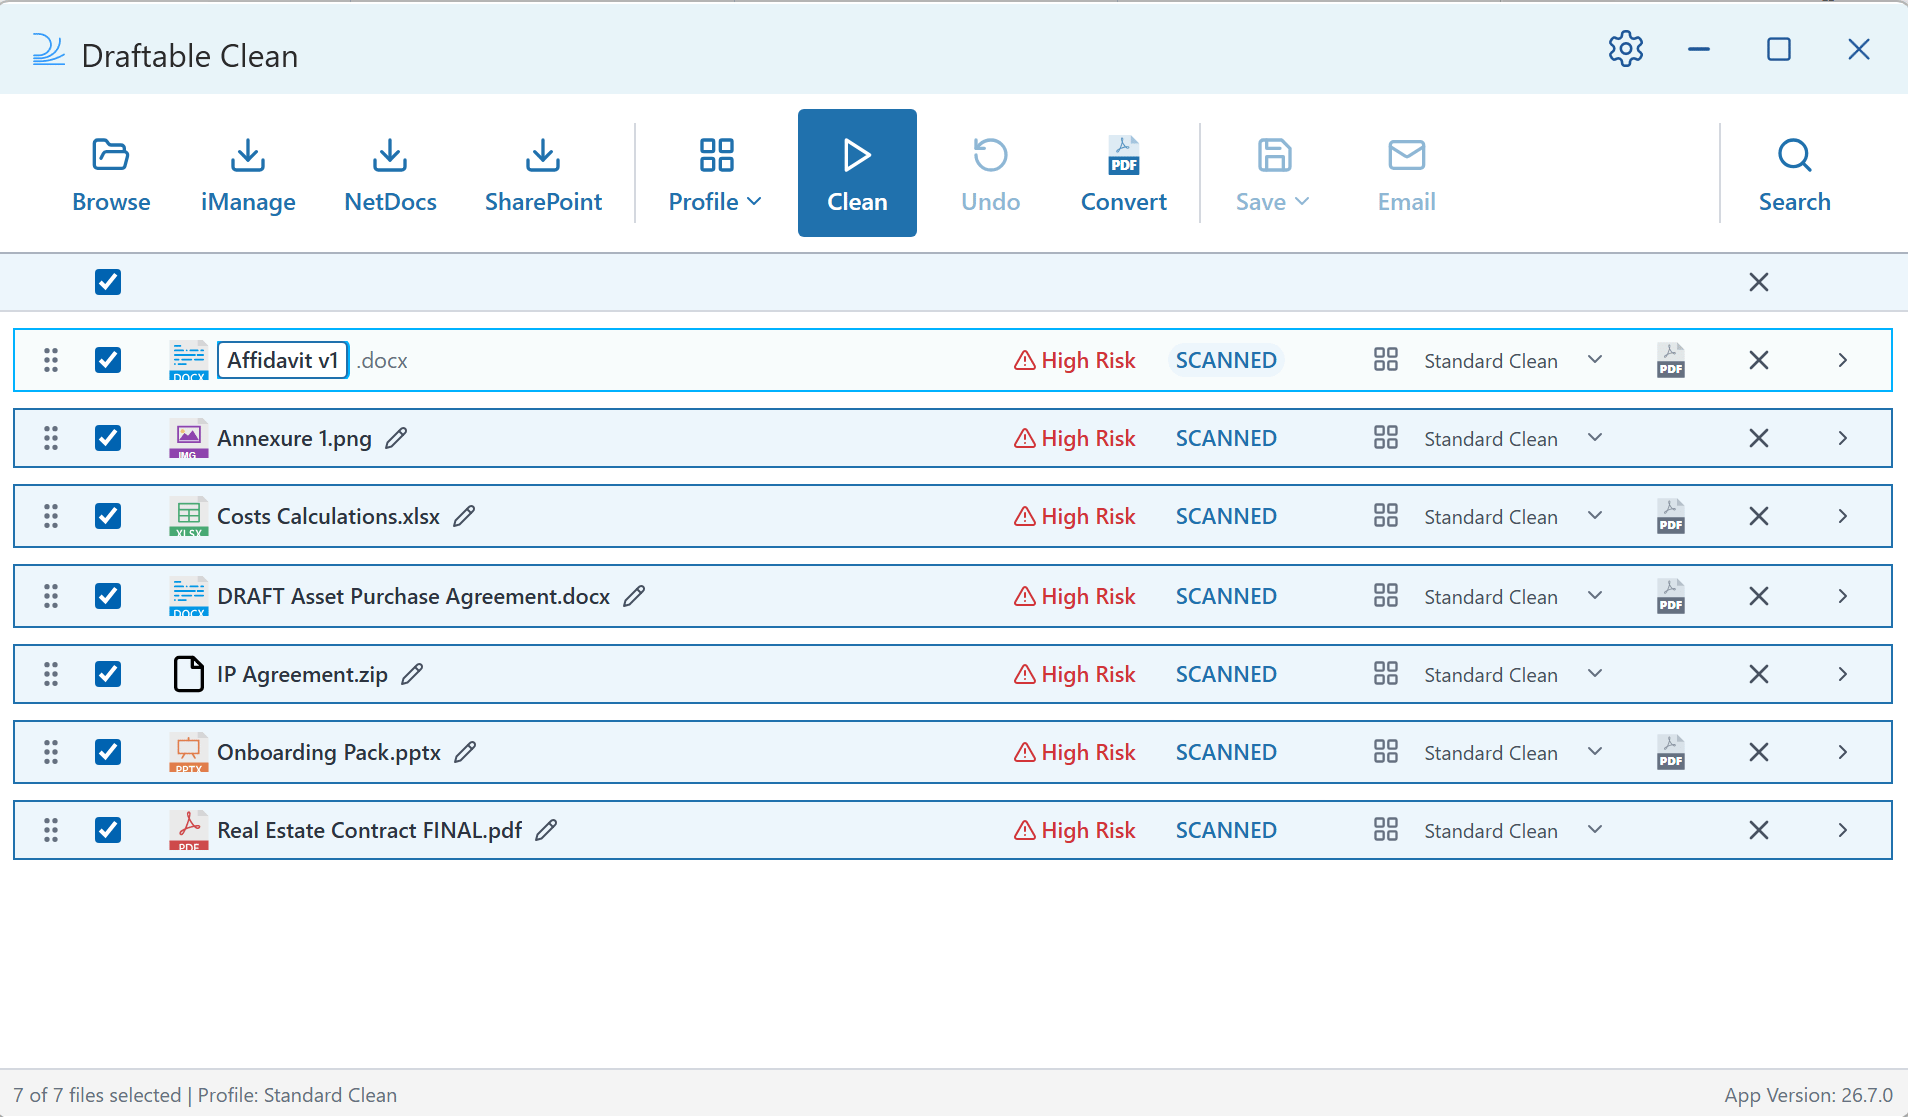
- Reorder — Drag files up or down in the list to change the attachment order.
File name rules. As of v26.9.0, the rename editor rejects names Windows does not allow and tells you why before you confirm. A file name cannot contain any of these characters:
\ / : * ? " < > |. Windows reserved device names — CON, PRN, AUX, NUL, COM1 to COM9, and LPT1 to LPT9 — cannot be used either.In earlier versions, typing a / in a name could result in everything before the slash being dropped when the file was saved.Converting to PDF
Before cleaning, you can optionally flag supported files for conversion to PDF. Click the PDF icon inline with a file to flag it — the icon turns blue when flagged. Alternatively, select one or more files and click Convert in the toolbar to flag them for conversion. Flagged files are converted when you click Clean. You can flag or unflag files for conversion before or after cleaning.