

The settings menu was reorganised in Draftable Legal 26.6. If you are on 26.6 or later, follow the “26.6 and later” tabs below. On earlier versions, follow “Before 26.6”. To check your version, open Settings. The version number shows at the bottom-left (for example, v26.6.0).
Note:Please note, to use this feature in your DMS, Administrators will need to update the relevant Draftable DMS Application.
Video Resource
This topic is included in our specially crafted explainer video.
What is 1-Click Compare?
1-Click Compare gets you to your preferred next action in “1-Click”. Users can launch a comparison of two files and generate their chosen ‘next action’ without any further steps. For example, you can use 1-Click Compare to go straight from selecting your files to:- Creating an email with redline outputs and input files attached.
- Copying input files and comparison outputs to your clipboard .
- Immediately printing your preferred comparison output.
- Saving your preferred comparison output to your DMS
- Opening your Redline in Word
How to set up your default comparison workflow
1
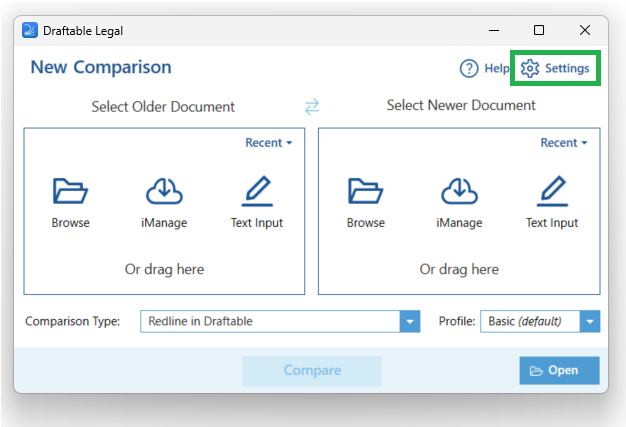
Open Draftable Desktop and go to the Settings Menu (in the top right corner of the New Comparison window)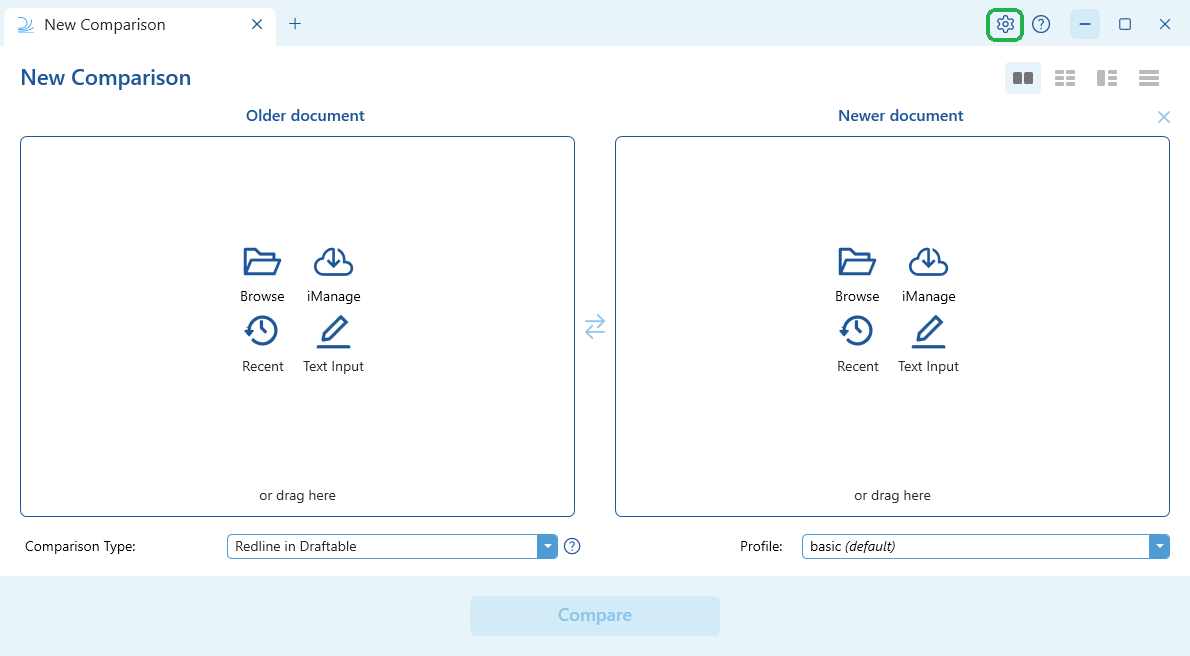
- 26.6 and later
- Before 26.6
2
Navigate to the 1-Click Compare tab on the left hand side of the settings menu, then under Comparison Type, select your preference.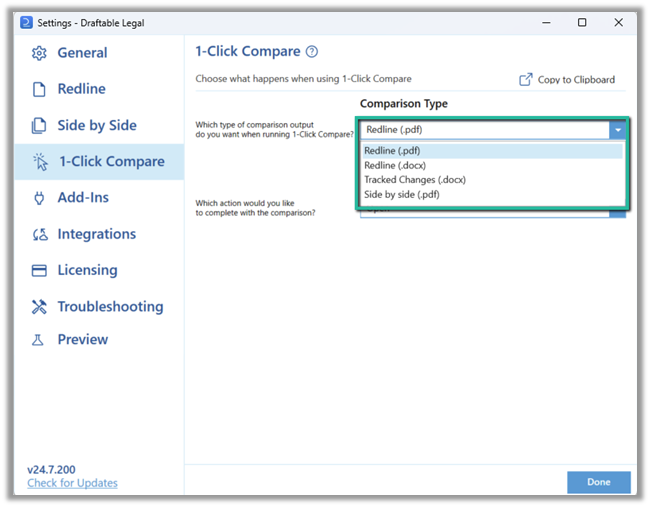
- Redline (.pdf) - generates a redline output as a PDF
- Redline (.docx) - generates a redline output as docx
- Tracked Changes (.docx) - generates a redline as a docx file with Tracked Changes
- Side-by-Side (.pdf) - generates a side by side comparison as a PDF
- Departures Table - generates a Departures Table (see Understanding and Using the Departures Table)
3
Then select the Next Action you want to perform with your comparison result from the list of options (note, depending on your organizational settings, some DMS-related options in the screenshot below may not be available).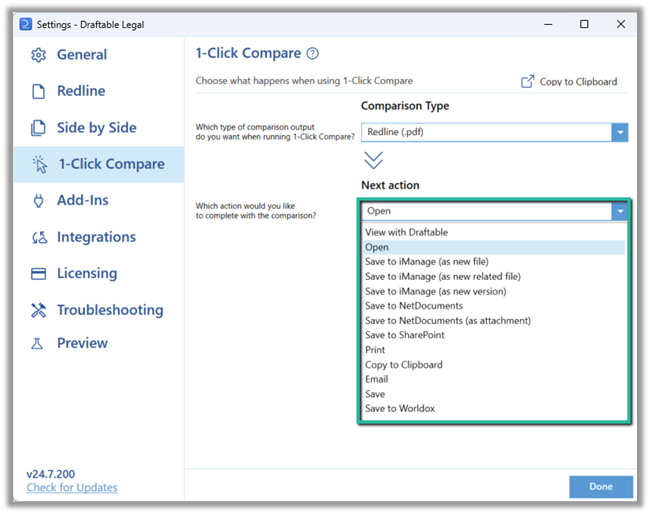
4
For certain Next Actions (e.g. Email, Copy to Clipboard), you may need to choose which files you would like included in the action.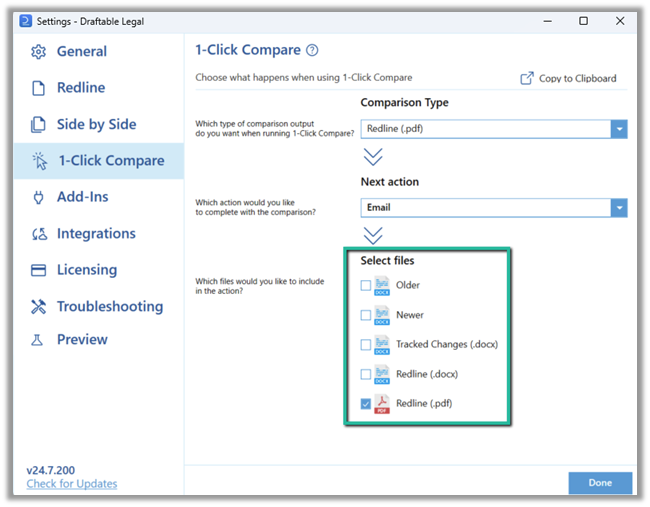
5
Once you have selected your preferred workflow, it will automatically save. Select Done to close the settings menu.
Running 1-Click Compares
1
To use 1-Click Compare with local files, open File Explorer and navigate to the files you want to compare.
2
Select the files you wish to compare while holding the ‘Ctrl’ button (to allow multi-select).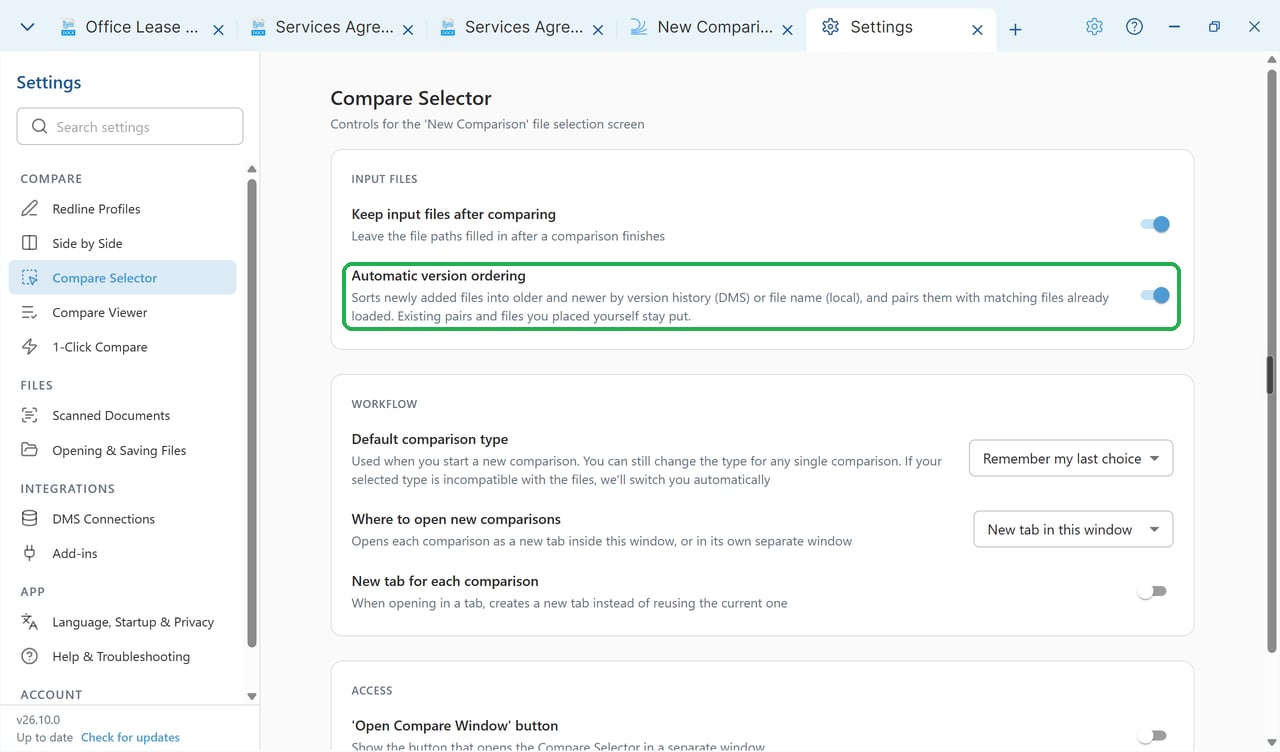
Note:With Automatic version ordering turned on (the default, under Settings > Compare Selector), Draftable uses matching and version clues to work out which file is older. For local files, it recognises names such as
Contract v 2.docx and Contract v. 3.docx. It can also use a trailing Base after at least two name words as an original-version hint, or a trailing (1) as a later-copy hint when stronger clues do not decide the order. It cannot determine the order of every selection. If you need to check or change which file is older, start from the New Comparison window and arrange the files before comparing.3
Once the files are selected, right click one of the files to show the Windows Context Menu.
Note:On Windows 11, each user can add Draftable’s actions to the main right-click menu by opening Settings > Add-ins > Extensions and selecting Install beside Windows 11 context menu. If you have not installed this menu, select Show more options to open the classic menu.
4
Select 1-Click in Draftable in either menu to start your default workflow.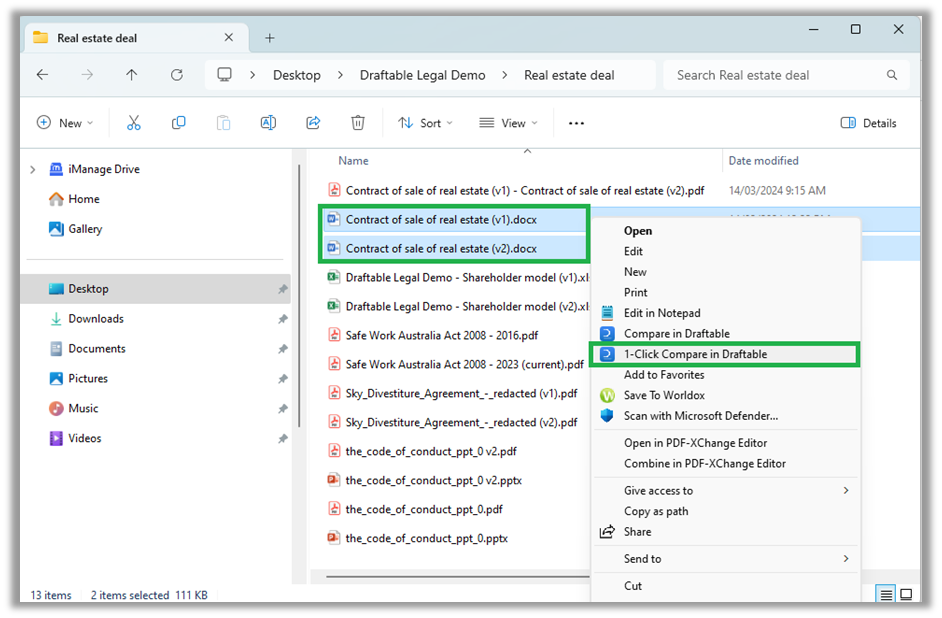
5
Your comparison will run automatically without any further action. You will see the comparison progress bar as it is performed.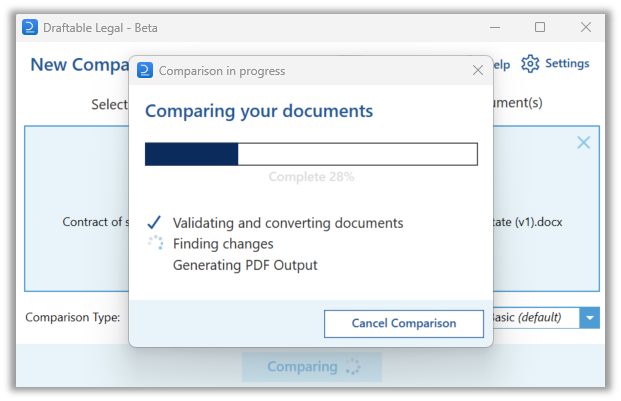
6
Once the comparison is completed, your nominated next action will be actioned (example below shows an email being generated). 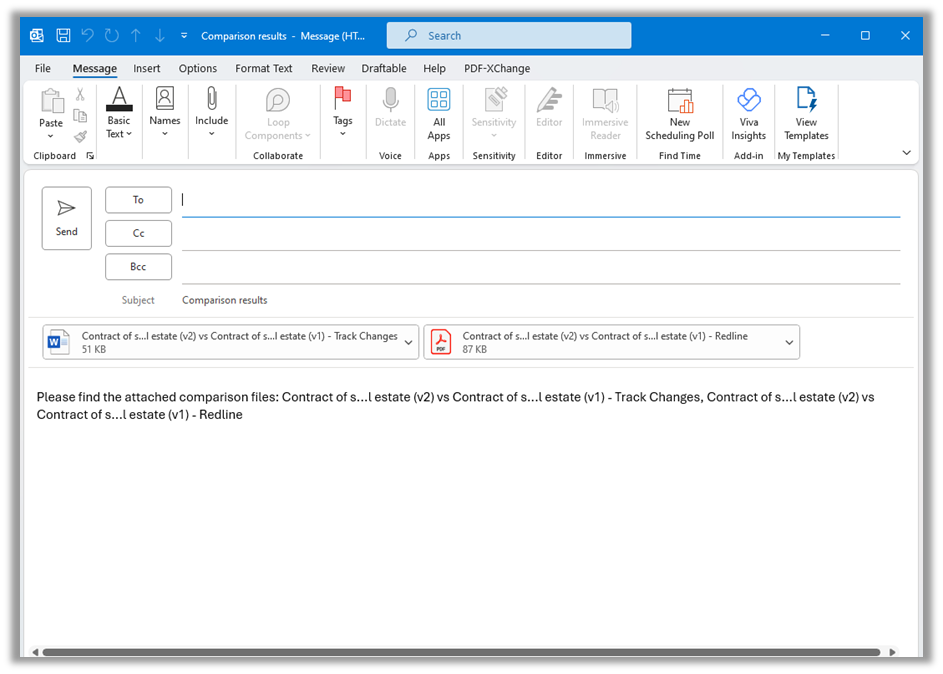
Running 1-Click Compare from iManage
Important notes:To use 1-Click Compare in iManage, your Administrator will need to update the Draftable Universal Application for iManage and add the new 1-Click Compare command to your context menus (see here for details).
1
Open iManage
2
Navigate to the folder where your input files are located
3
Select the two file(s) you wish to compare using 1-click compare, If choosing two separate files (as opposed to two versions of the same file) remember to select them in the correct order you wish to compare them (i.e. select the ‘older’ file first and the ‘newer’ file second).
4
Once the files are selected, Right Click a file and choose 1-Click Compare from the drop down menu.
Or alternatively, you can use the 1-Click Compare icon in the ribbon (top) menu, highlighted in the screenshot below.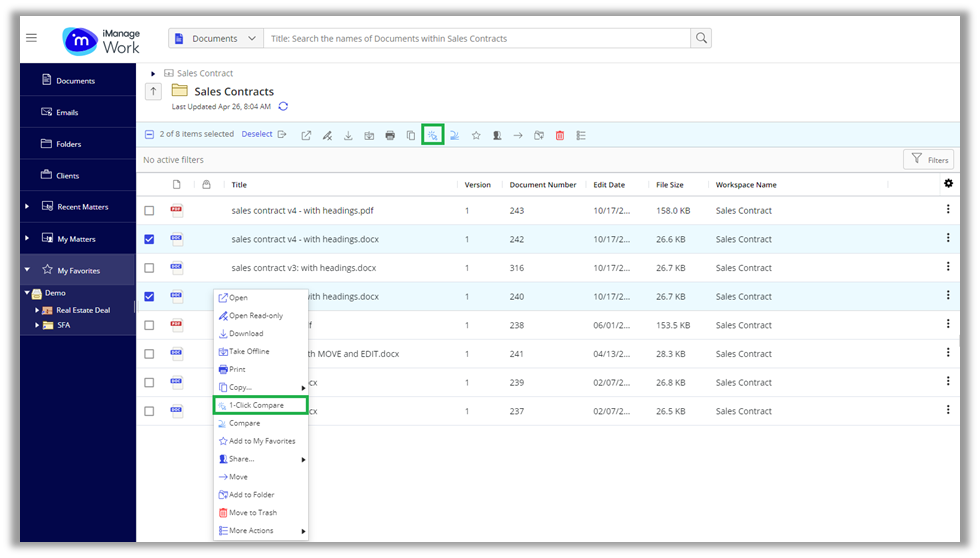
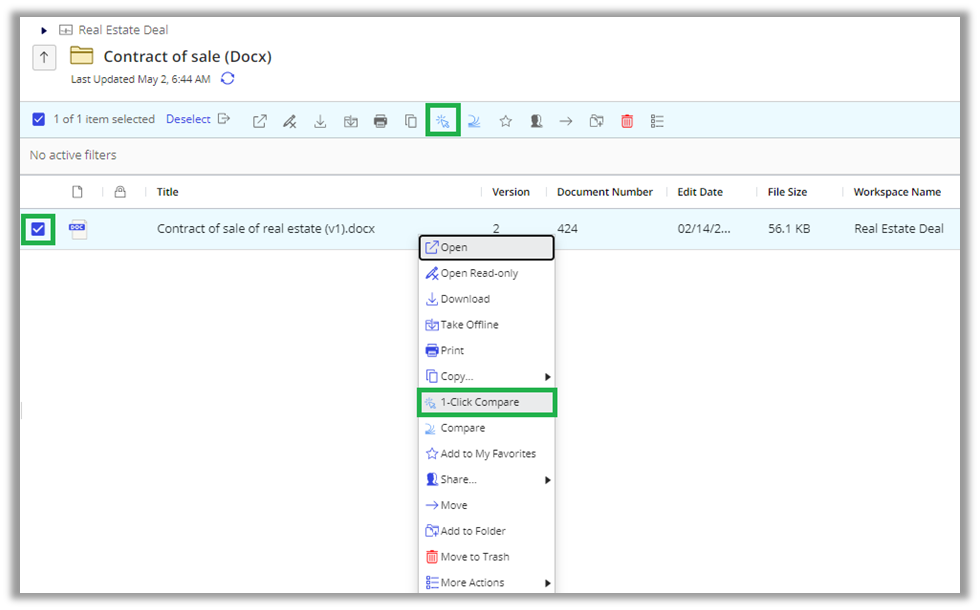
Or alternatively, you can use the 1-Click Compare icon in the ribbon (top) menu, highlighted in the screenshot below.
5
Your 1-Click Compare should now run with the selected files
Running 1-Click Compare from NetDocuments
Important notes:To use 1-Click Compare in NetDocuments, users must first have their cabinet settings updated by their administrator to add the command in the ‘send to application’ options (see here for details).
1
Open NetDocuments
2
Navigate to the folder where your input files are located
3
Select the two file(s) you wish to compare using 1-click compare. Note: In NetDocuments, you must load exactly two separate files (as opposed to one file with multiple versions) for 1-Click Compare to work.
4
Once your files are selected, right click and select ‘Send to application’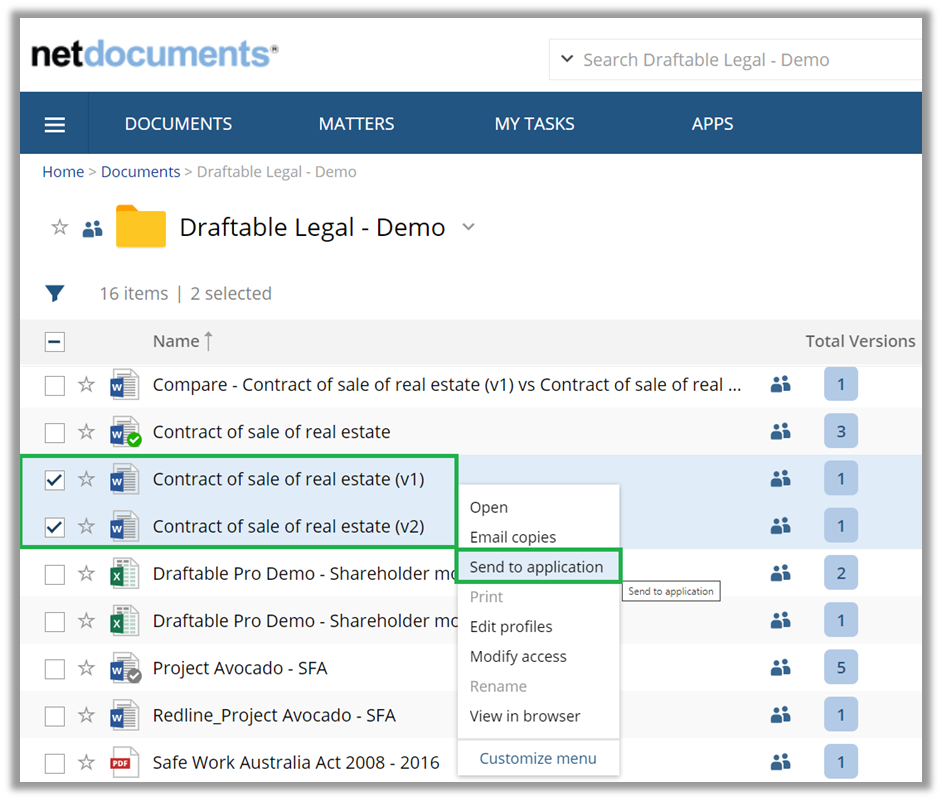
5
In the send to application window, make sure only the two files selected are in the ‘Marked Items’ list and select ‘Draftable 1-Click Compare’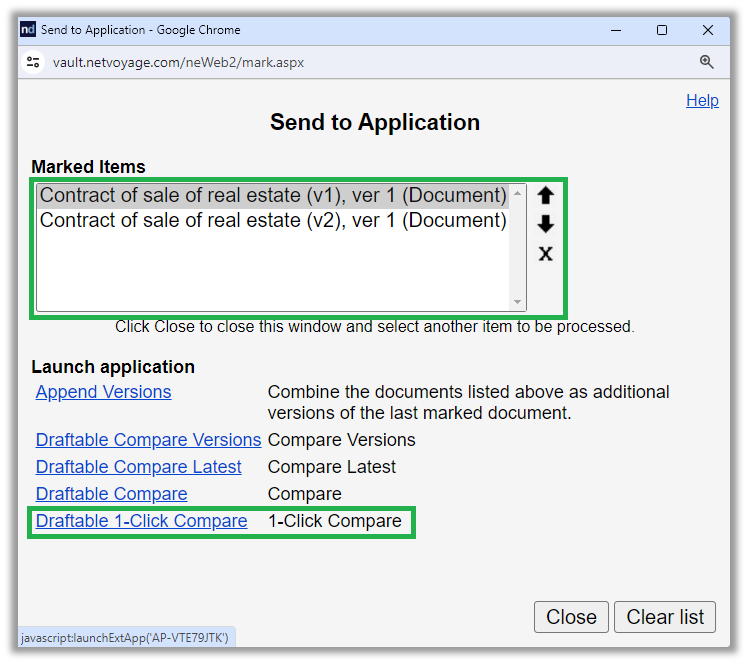
6
Your 1-Click Compare should now run with the selected files
Running 1-Click Compare from SharePoint
Important notes:To use 1-Click Compare in SharePoint your Administrator will need to update the Draftable SharePoint extension to add the new 1-Click Compare command to your context menus (see here for details).
1
Open SharePoint online in your web browser
2
Navigate to the Site and folder where your input files are located
3
Select the two files you wish to compare, remembering to select the files in the correct order you wish to compare them (i.e. select the ‘older’ file first and the ‘newer’ file second).
4
Once the files are selected, select 1-Click Compare from the ribbon menu OR Right Click a selected file and choose 1-Click Compare from the drop down menu.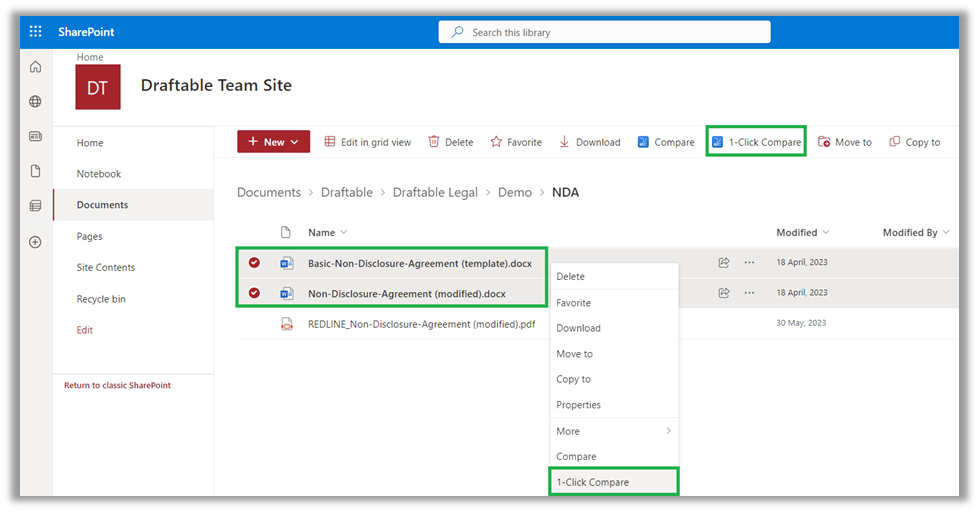
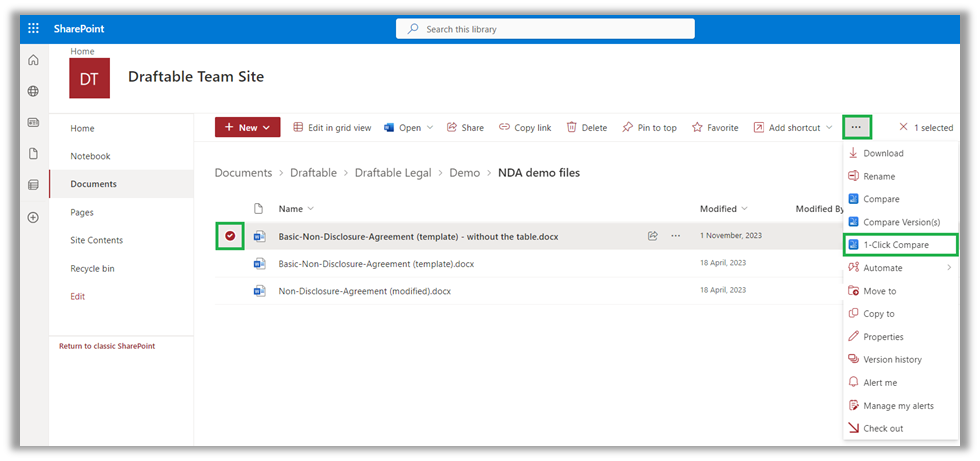
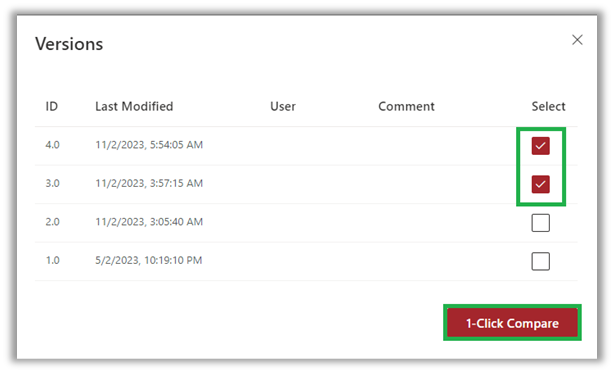
5
Your 1-Click Compare should now run with the selected files